SSO with Microsoft Entra ID OIDC
This guide will walk you through the steps to configure Microsoft Entra ID for OpenID Connect (OIDC) integration with your application.
Step 1: Register a New Application
-
Navigate to App Registrations
In the Azure portal, go to Azure Active Directory > App registrations.
-
Create a New Registration
Click on New registration.

-
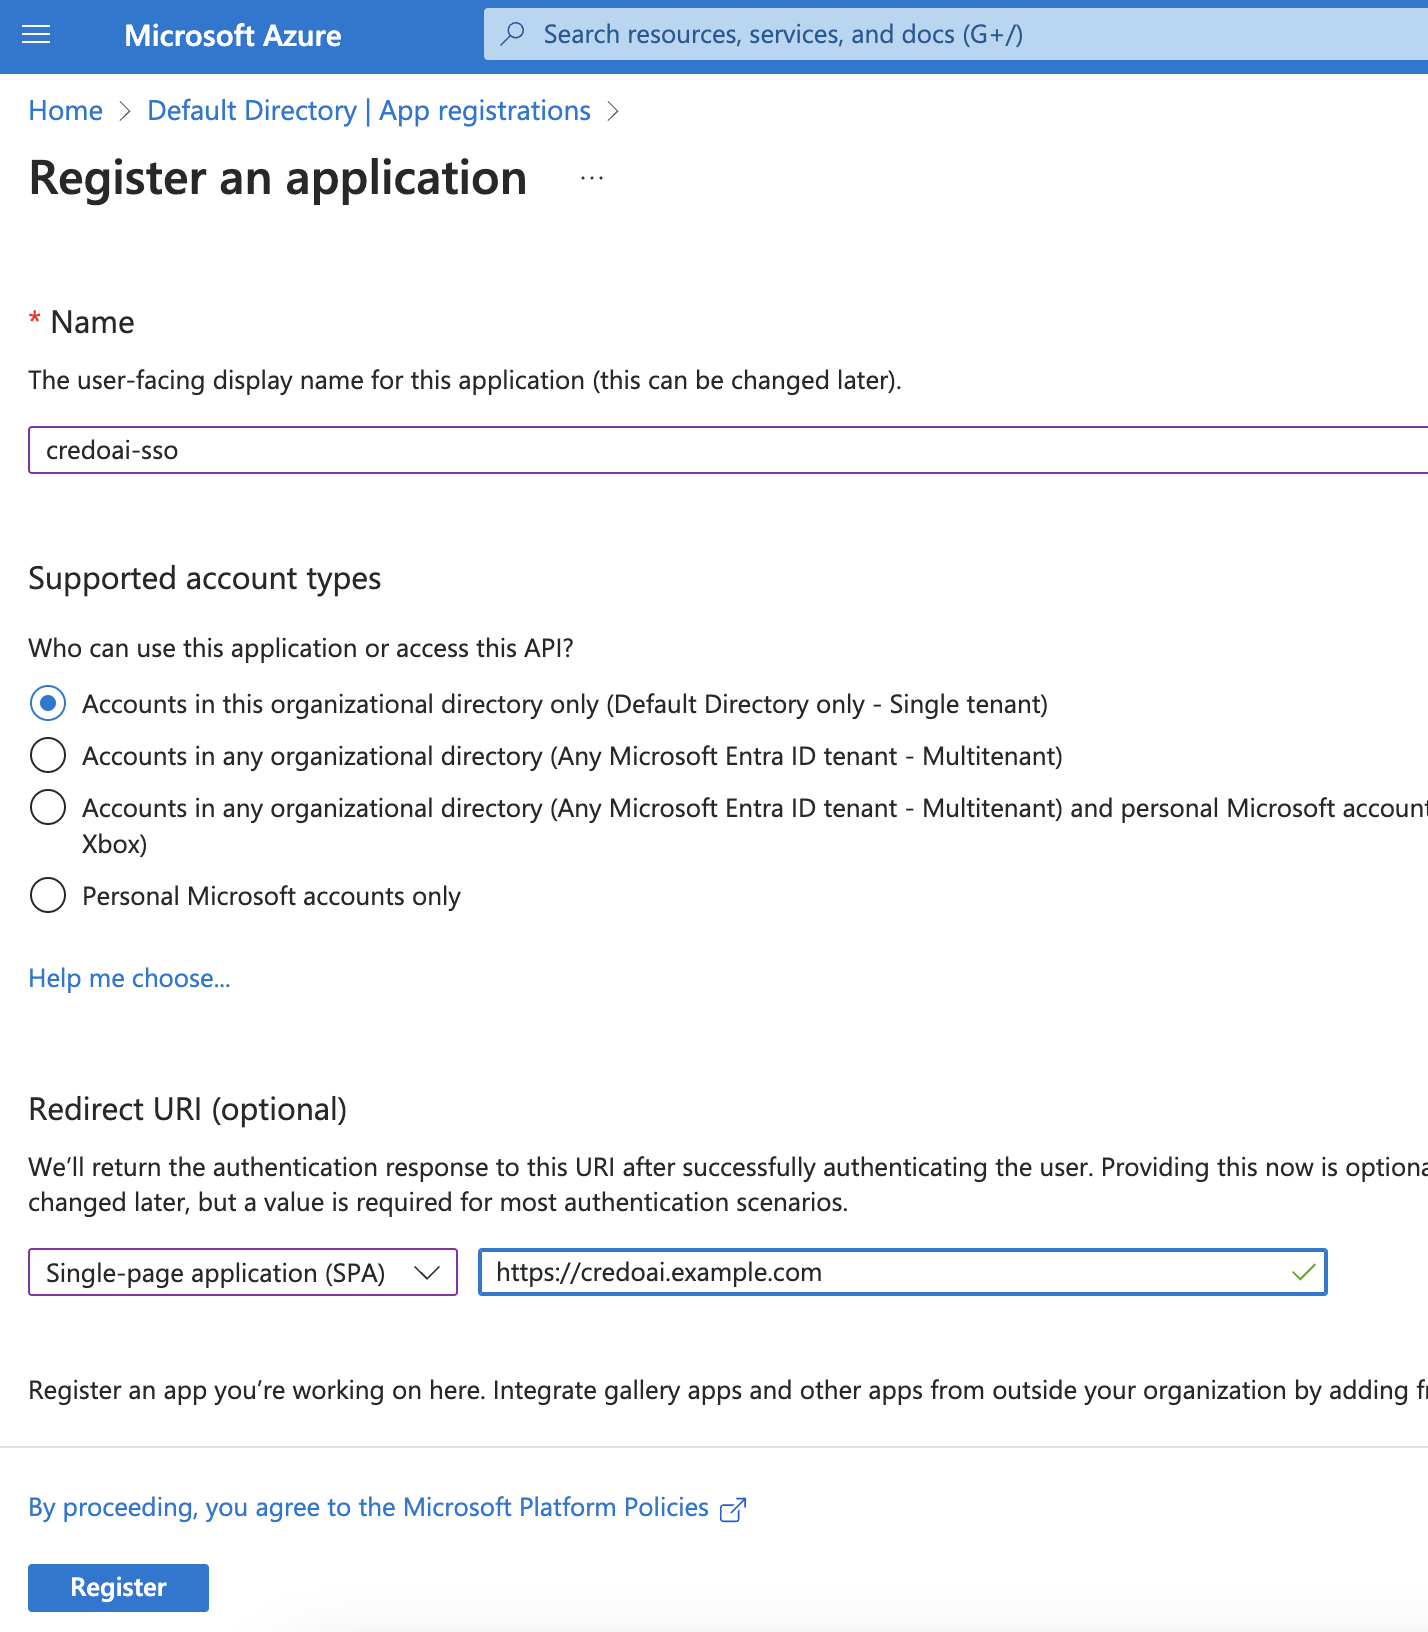
Register an Application
- Name: Enter the name for the application (e.g.,
credoai-sso). - Supported account types: Choose the appropriate option for your scenario. If unsure, select Accounts in this organizational directory only.
- Select the Redirect URI type: Choose Single-page application (SPA)
- Redirect URI: Enter the URI of the application installation. This might look like
https://credoai.<your-domain>/
Once completed, click Register.
- Name: Enter the name for the application (e.g.,
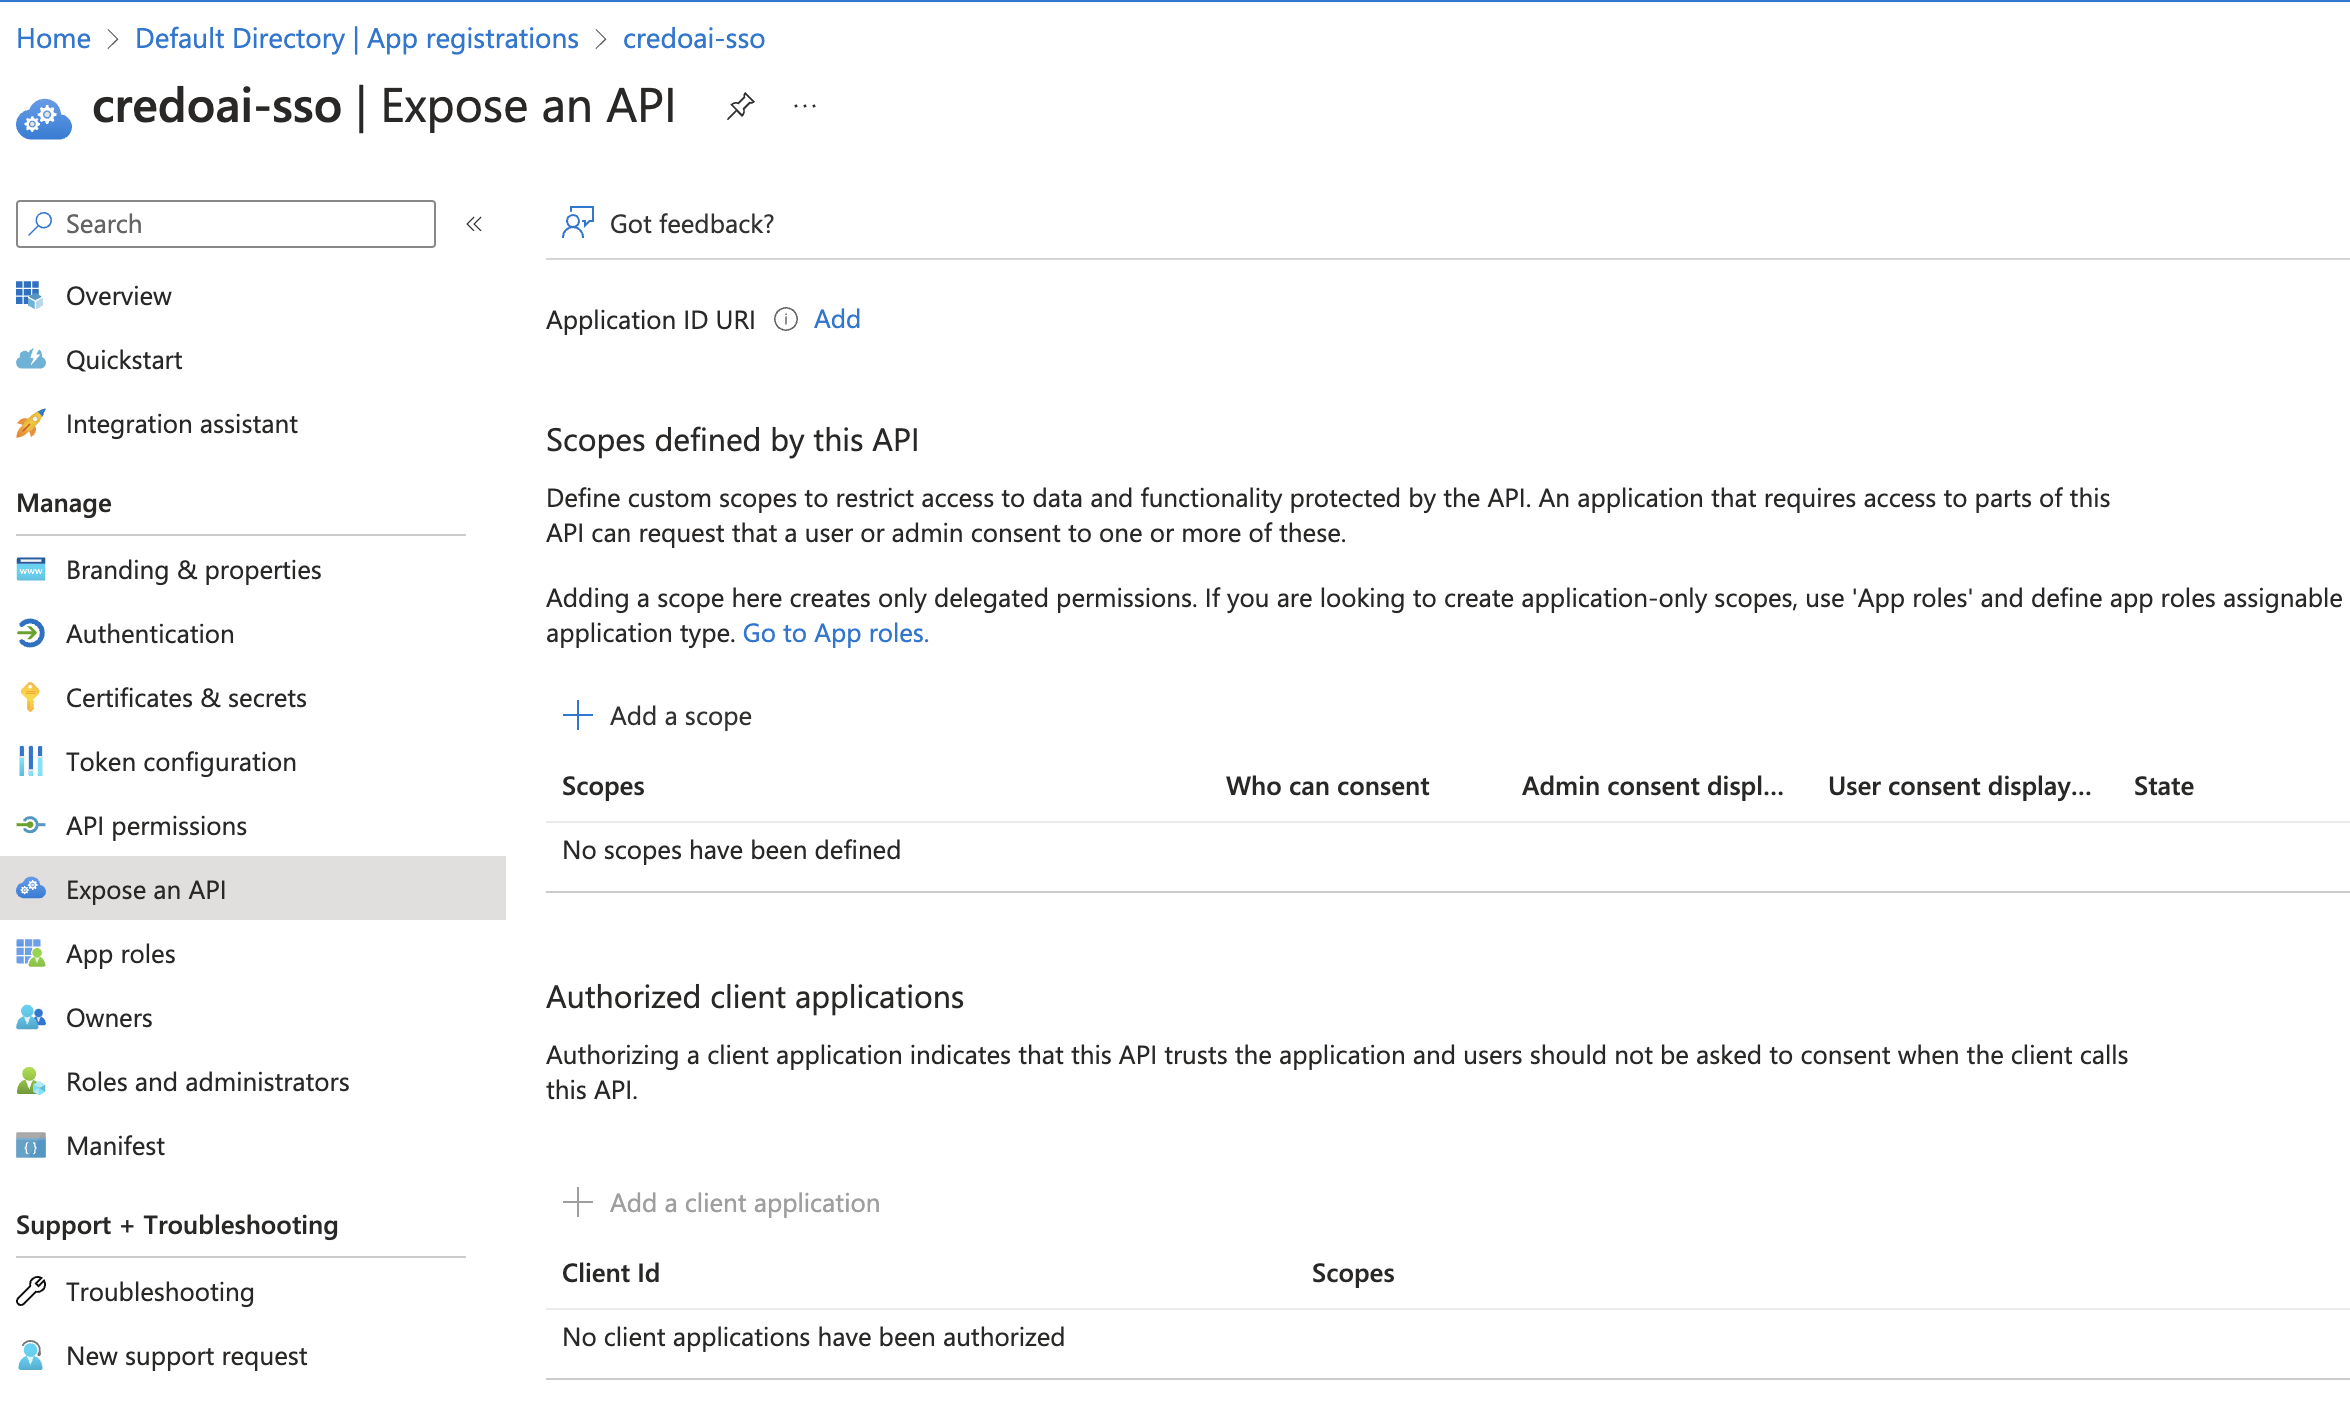
Step 2: Expose an API
-
Navigate to Expose an API
After registering your application, go to Expose an API under Manage.
-
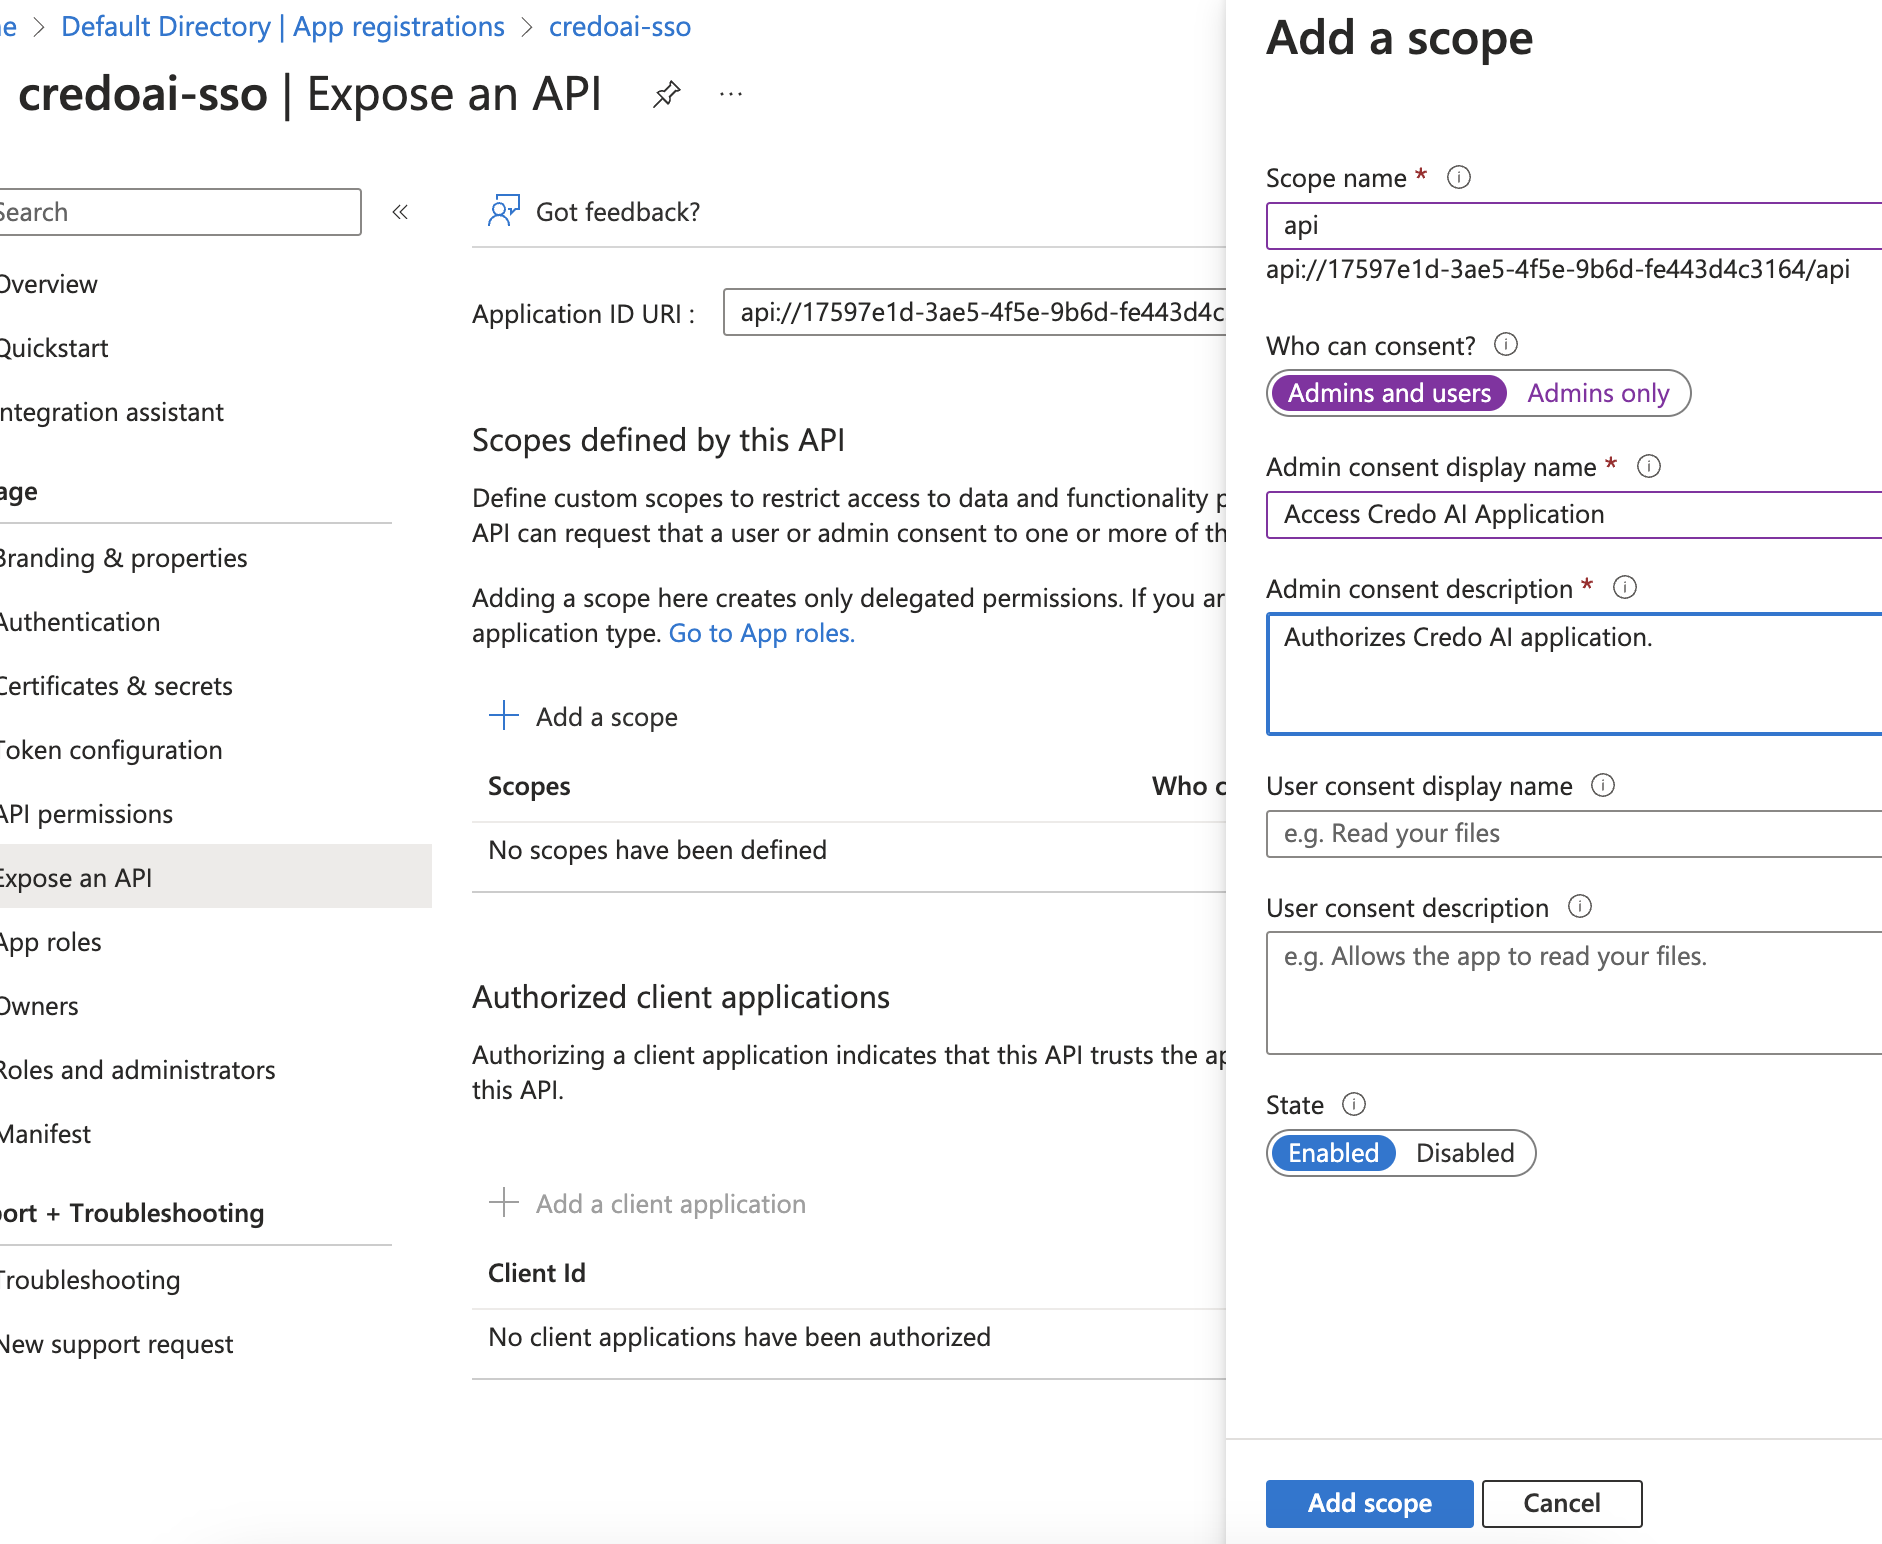
Add a Scope
Click Add a scope to define a new scope.
- Scope name: Enter
api. This will create a scope that looks likeapi://<client-id>/api. Copy this for later use in the application configuration. - Admin consent display name: Provide a description (e.g.,
Authorizes Credo AI application.). - State: Ensure it is set to Enabled.
Click Add scope when done.
- Scope name: Enter
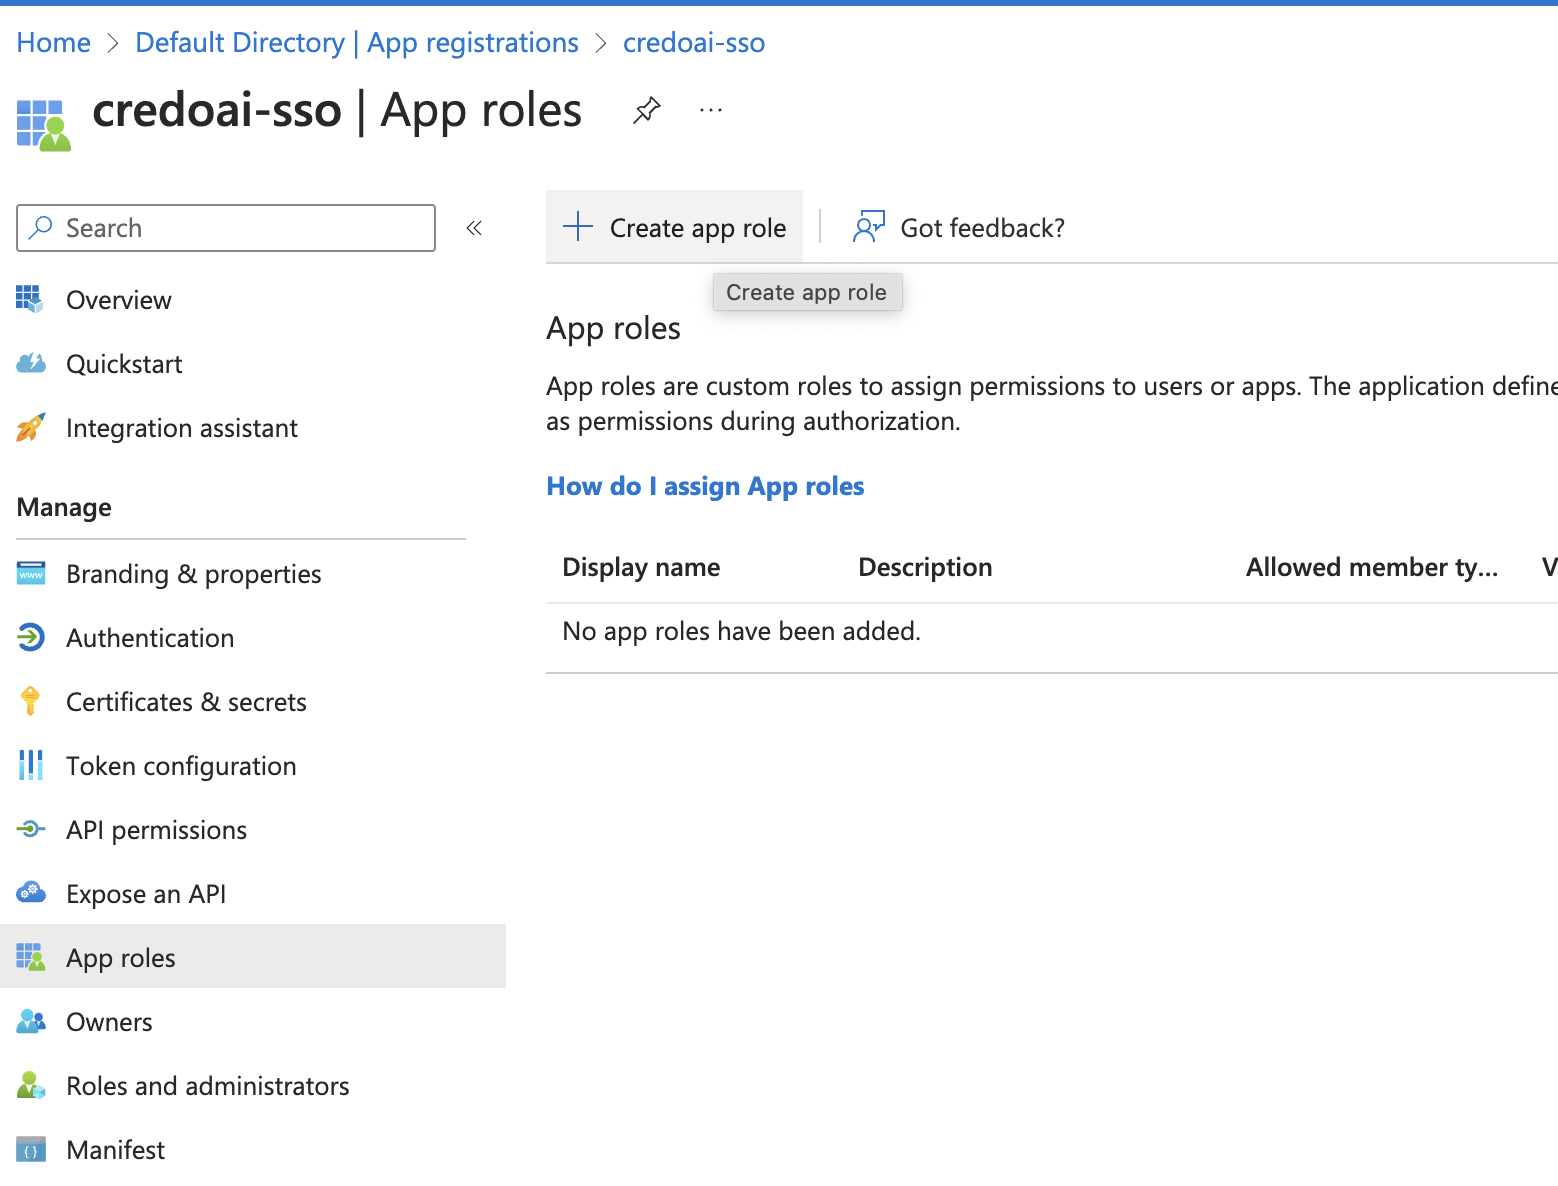
Step 3: Configure App Roles
-
Navigate to App Roles
Go to App roles under Manage.
-
Create a New Role
Click Create app role to define a new role for your application.
- Display name: Enter a name for the role (e.g.,
Admin User). - Allowed member types: Select who can be assigned this role (e.g.,
Users/Groups). - Value: Enter a unique value (e.g.,
admin). - Description: Provide a description for the role.
Click Apply when done.
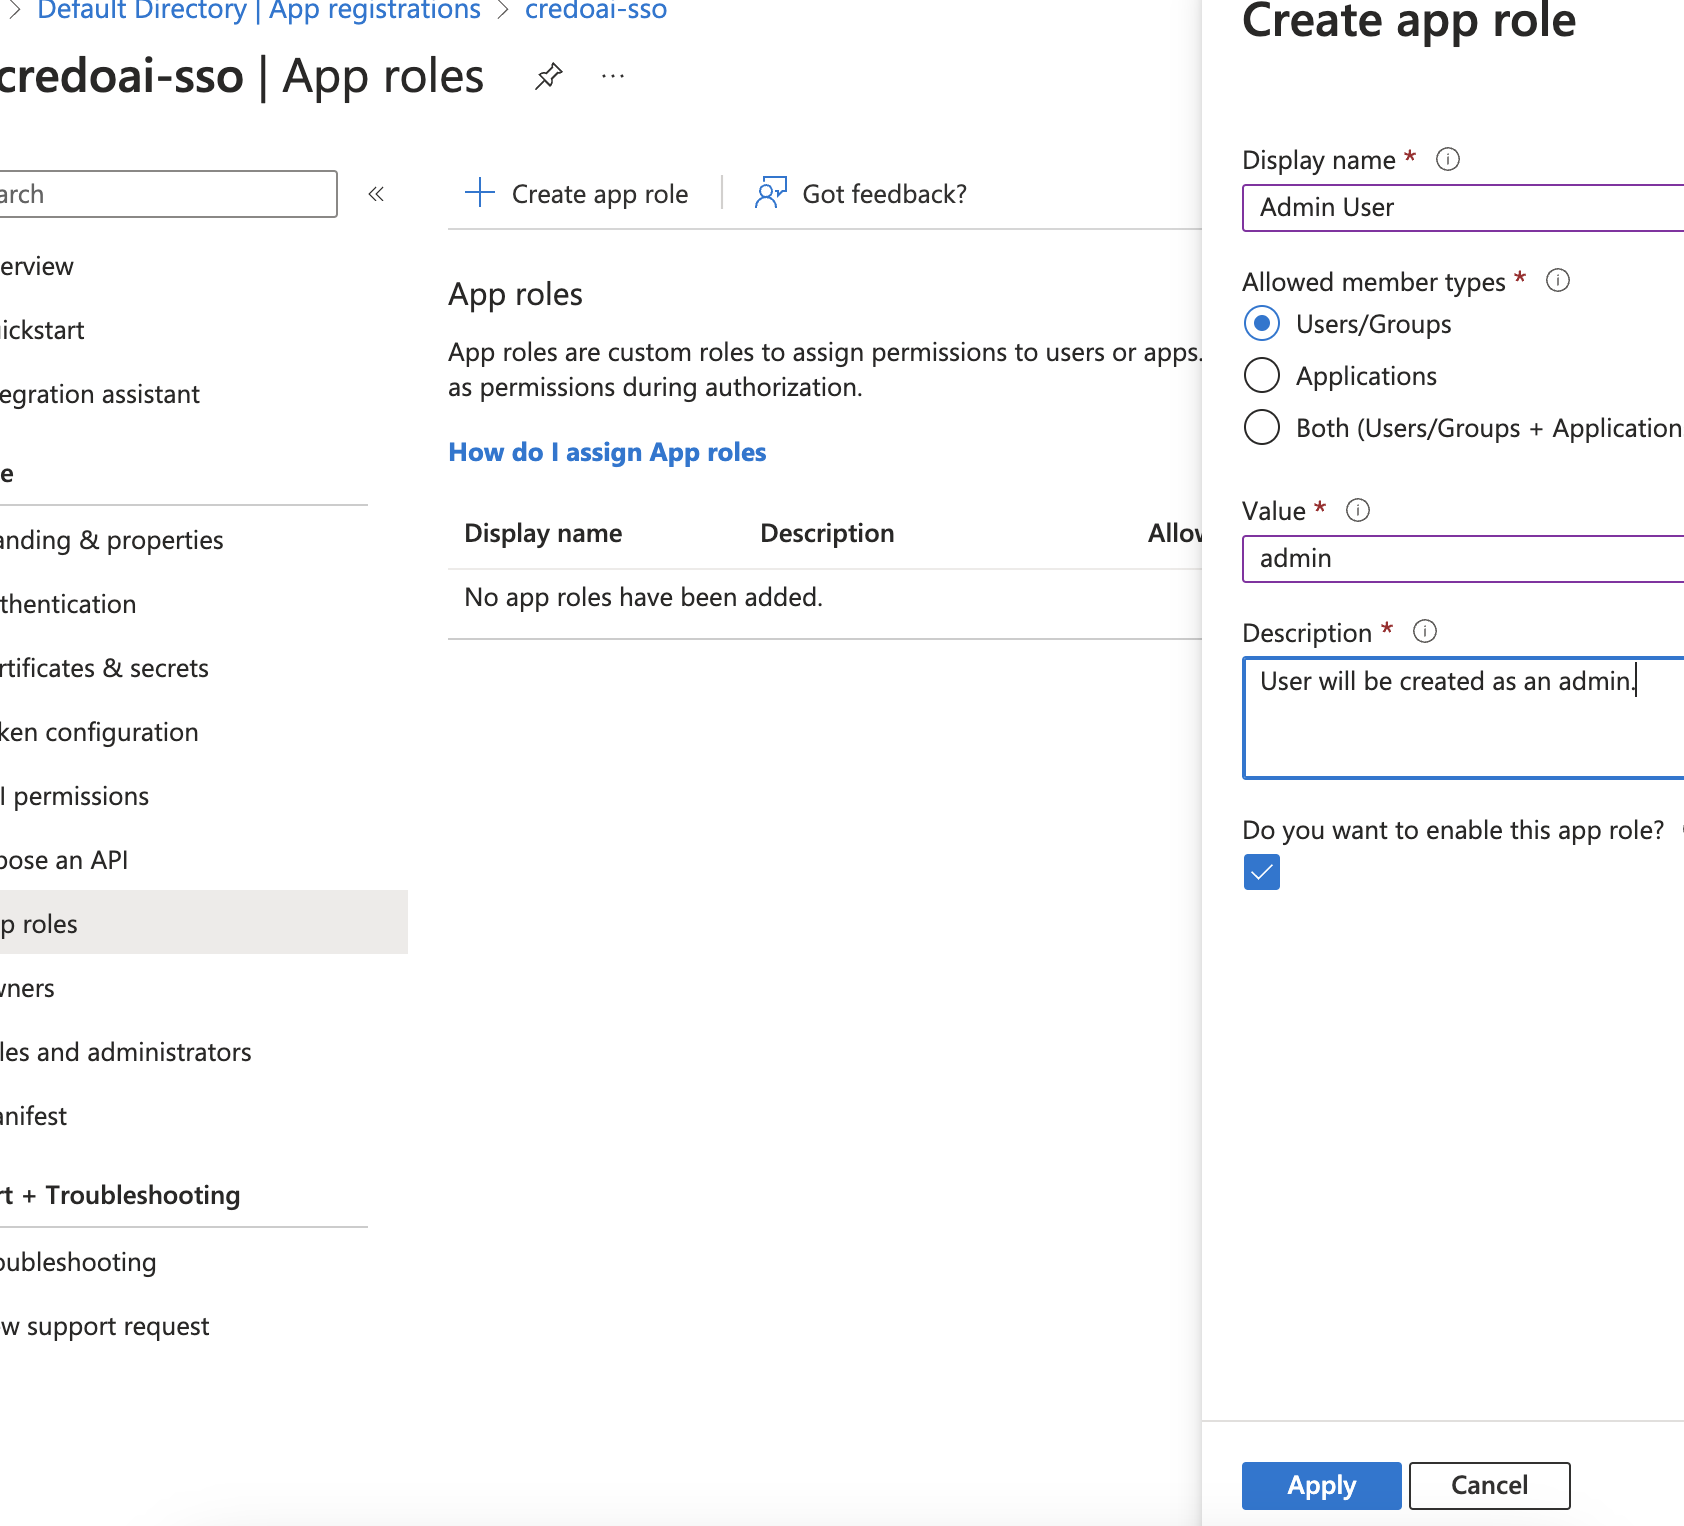
- Display name: Enter a name for the role (e.g.,
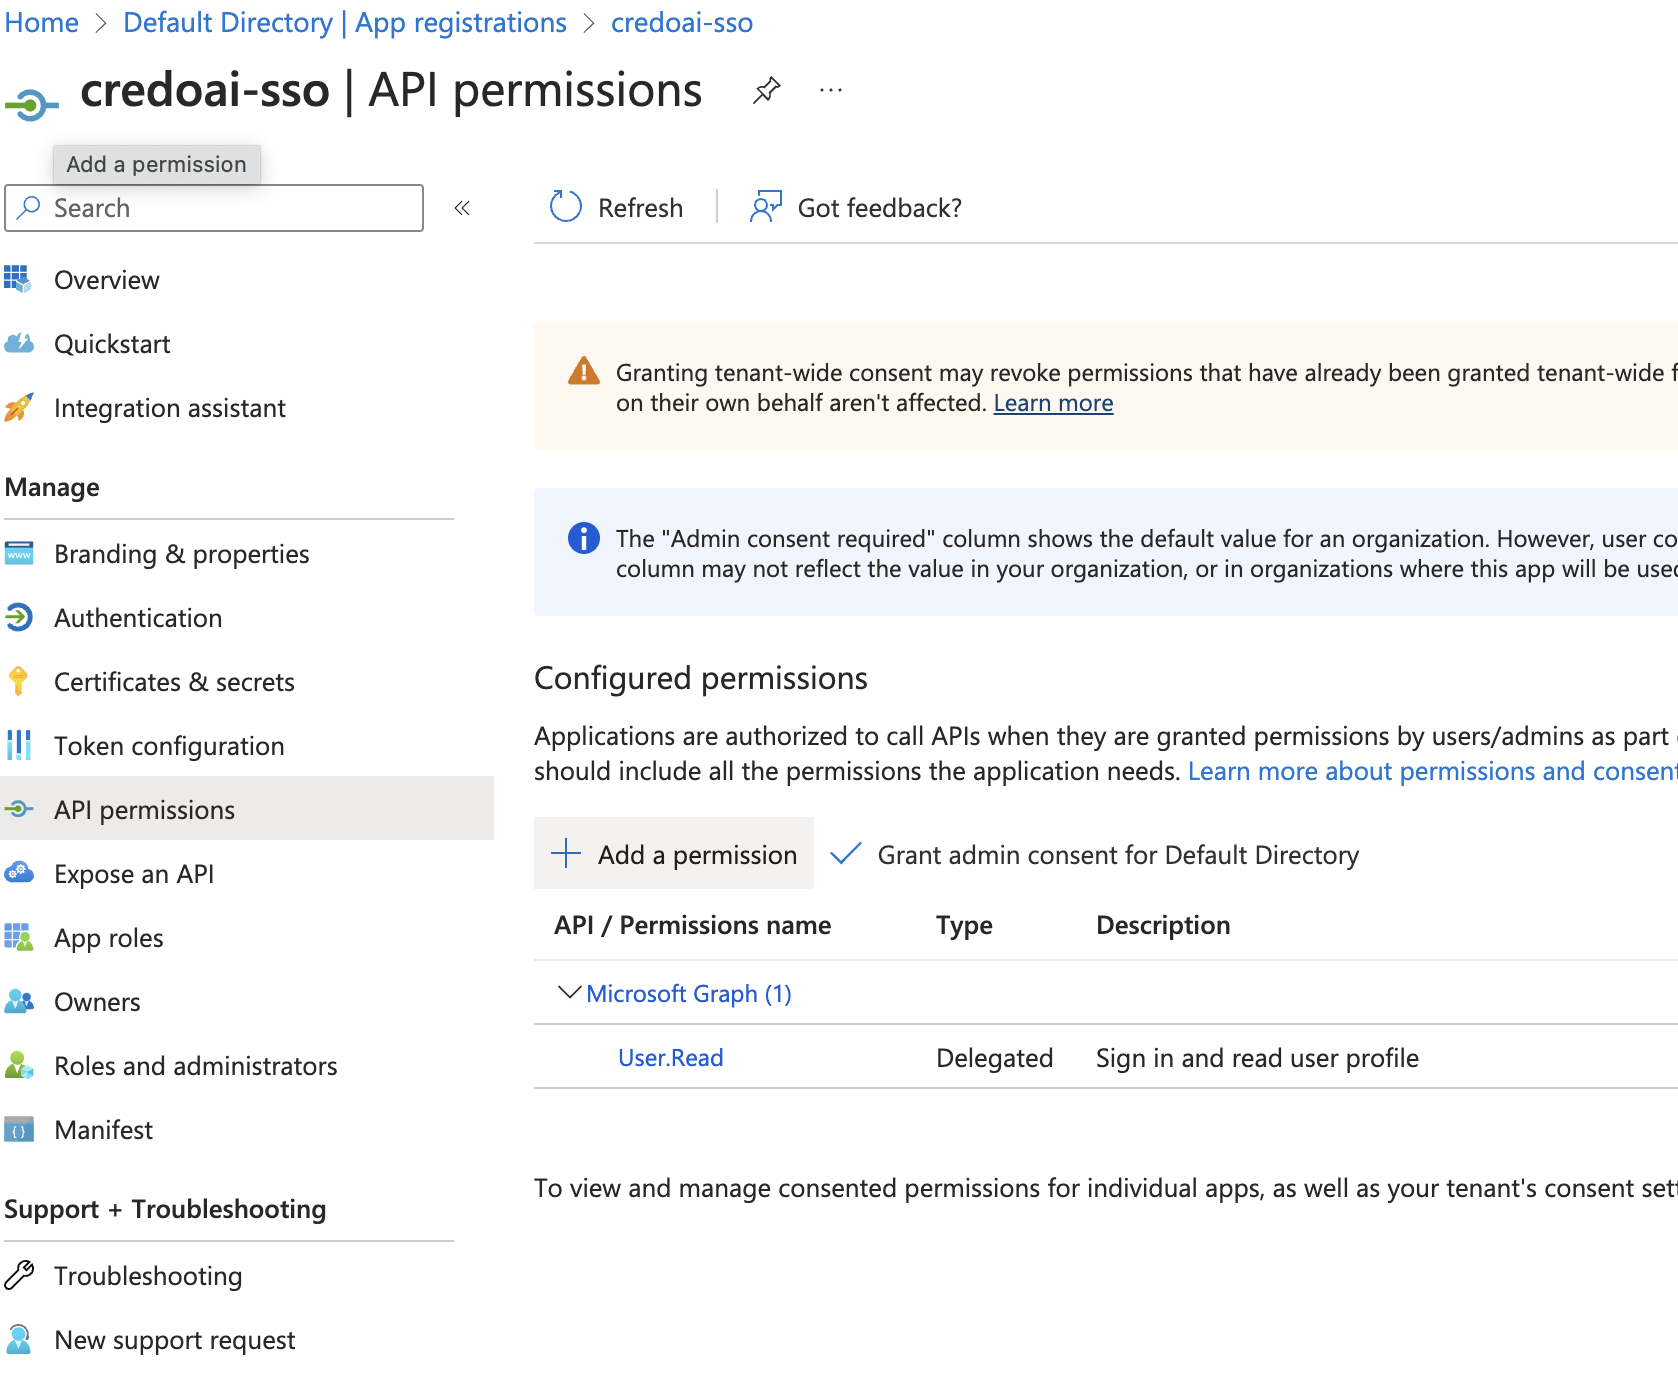
Step 4: Configure API Permissions
-
Navigate to API Permissions
Go to API permissions under Manage.
-
Add API Permissions
Click Add a permission.
-
Add API Permissions
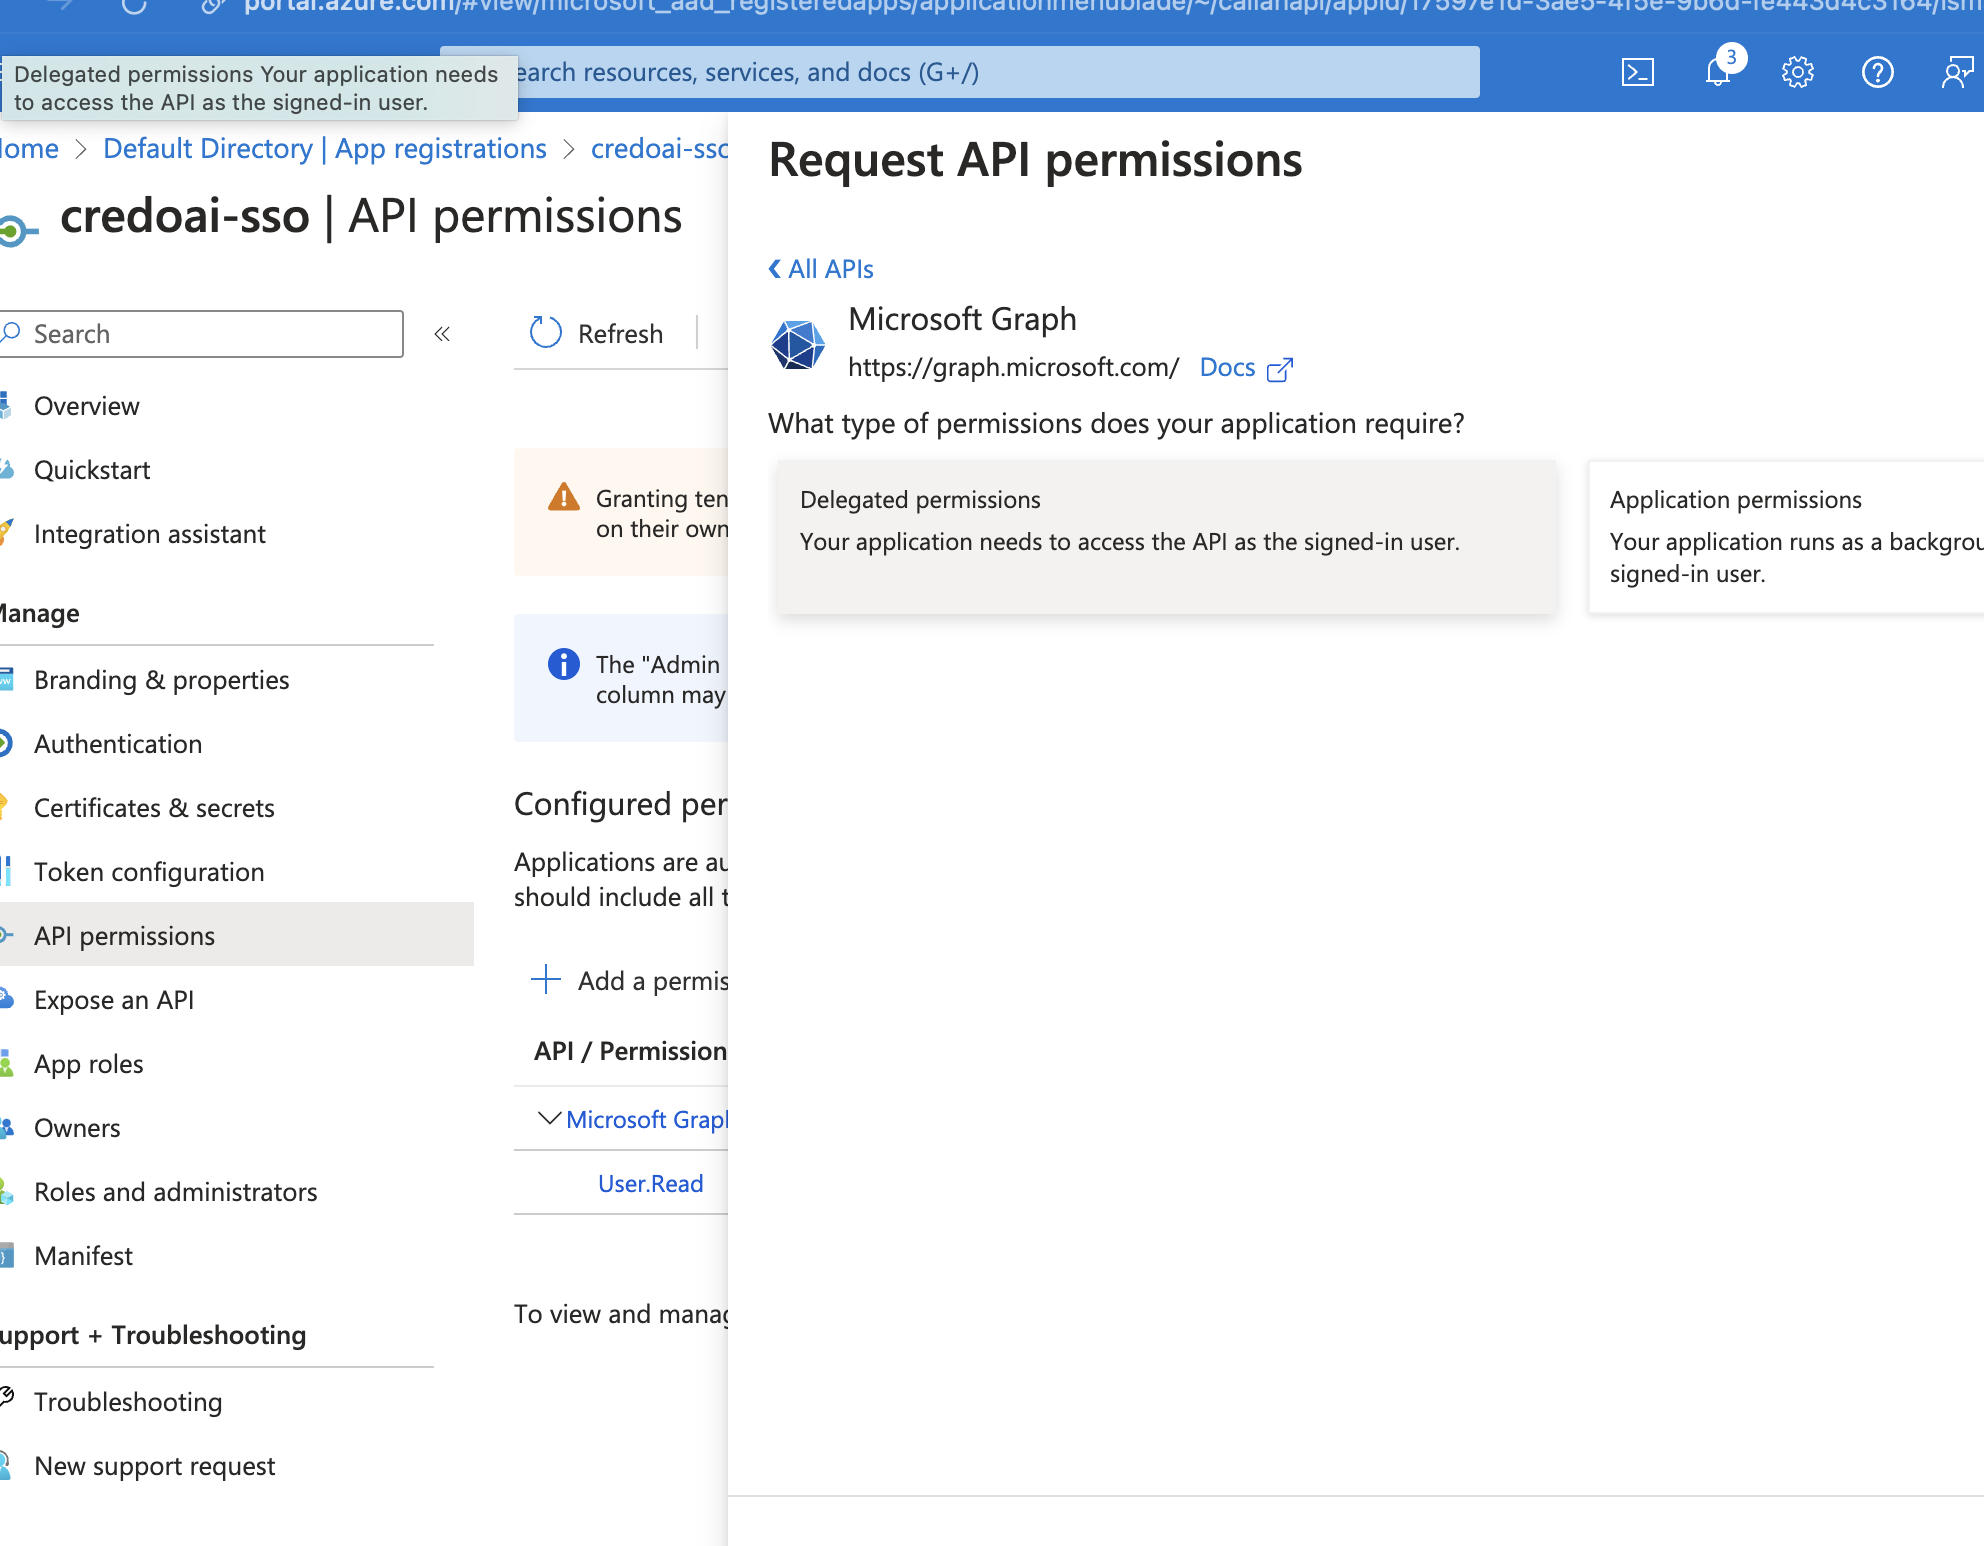
Choose Microsoft APIs > Microsoft Graph.
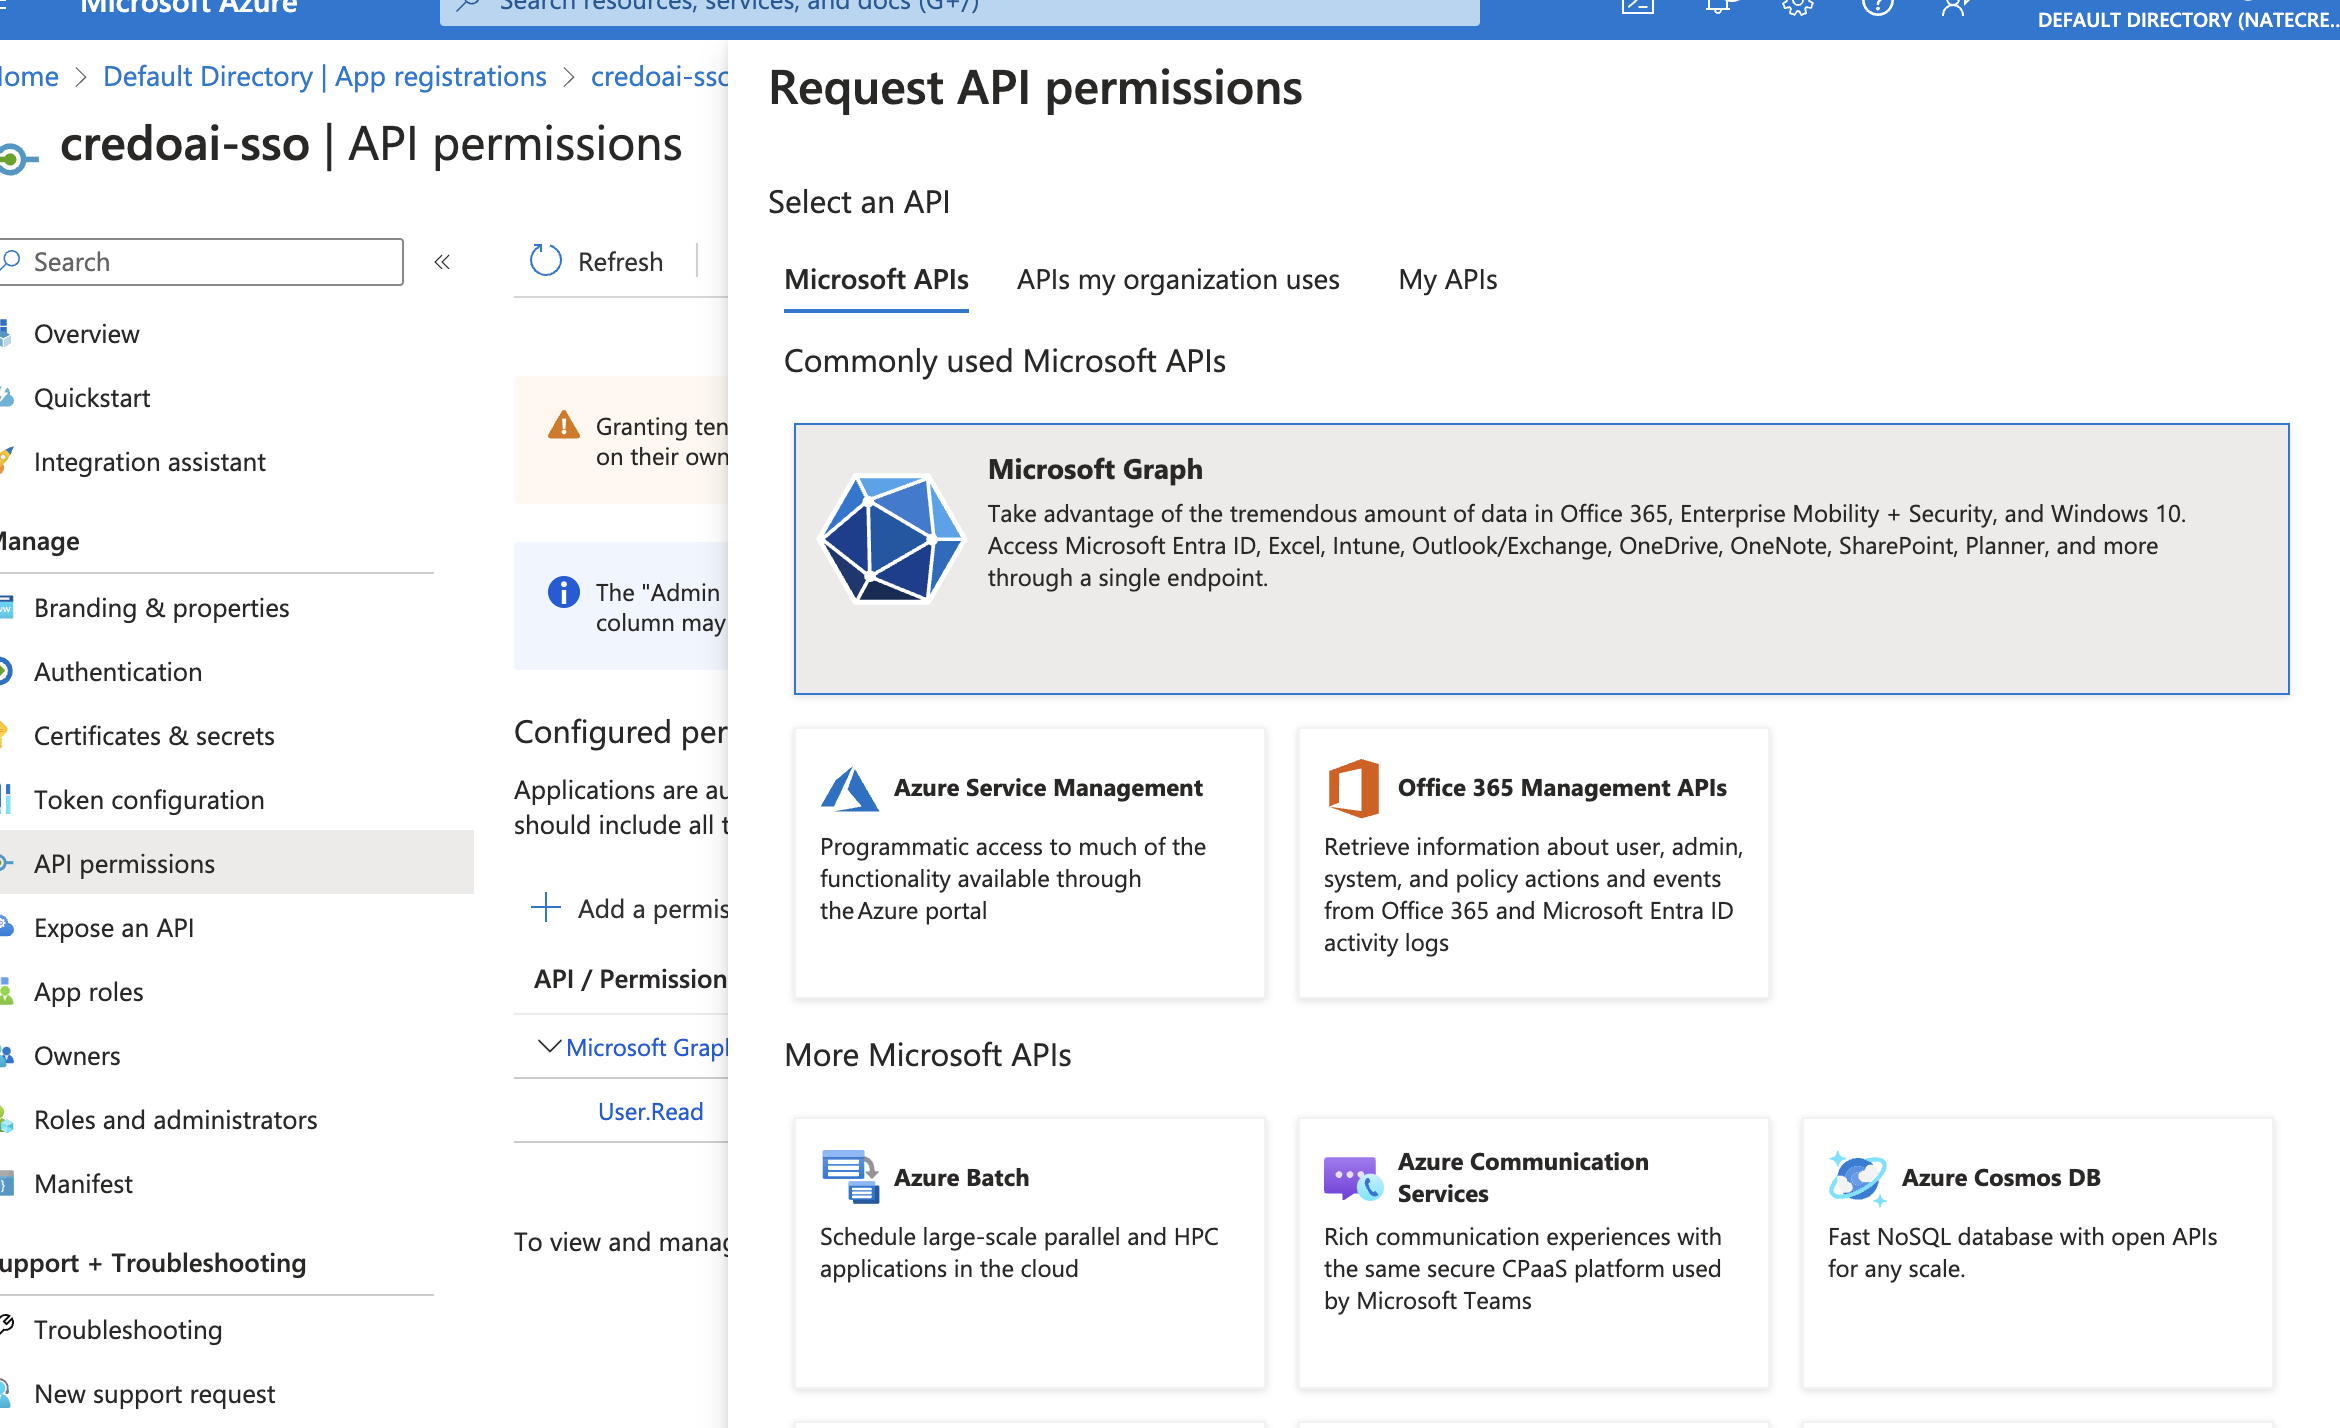
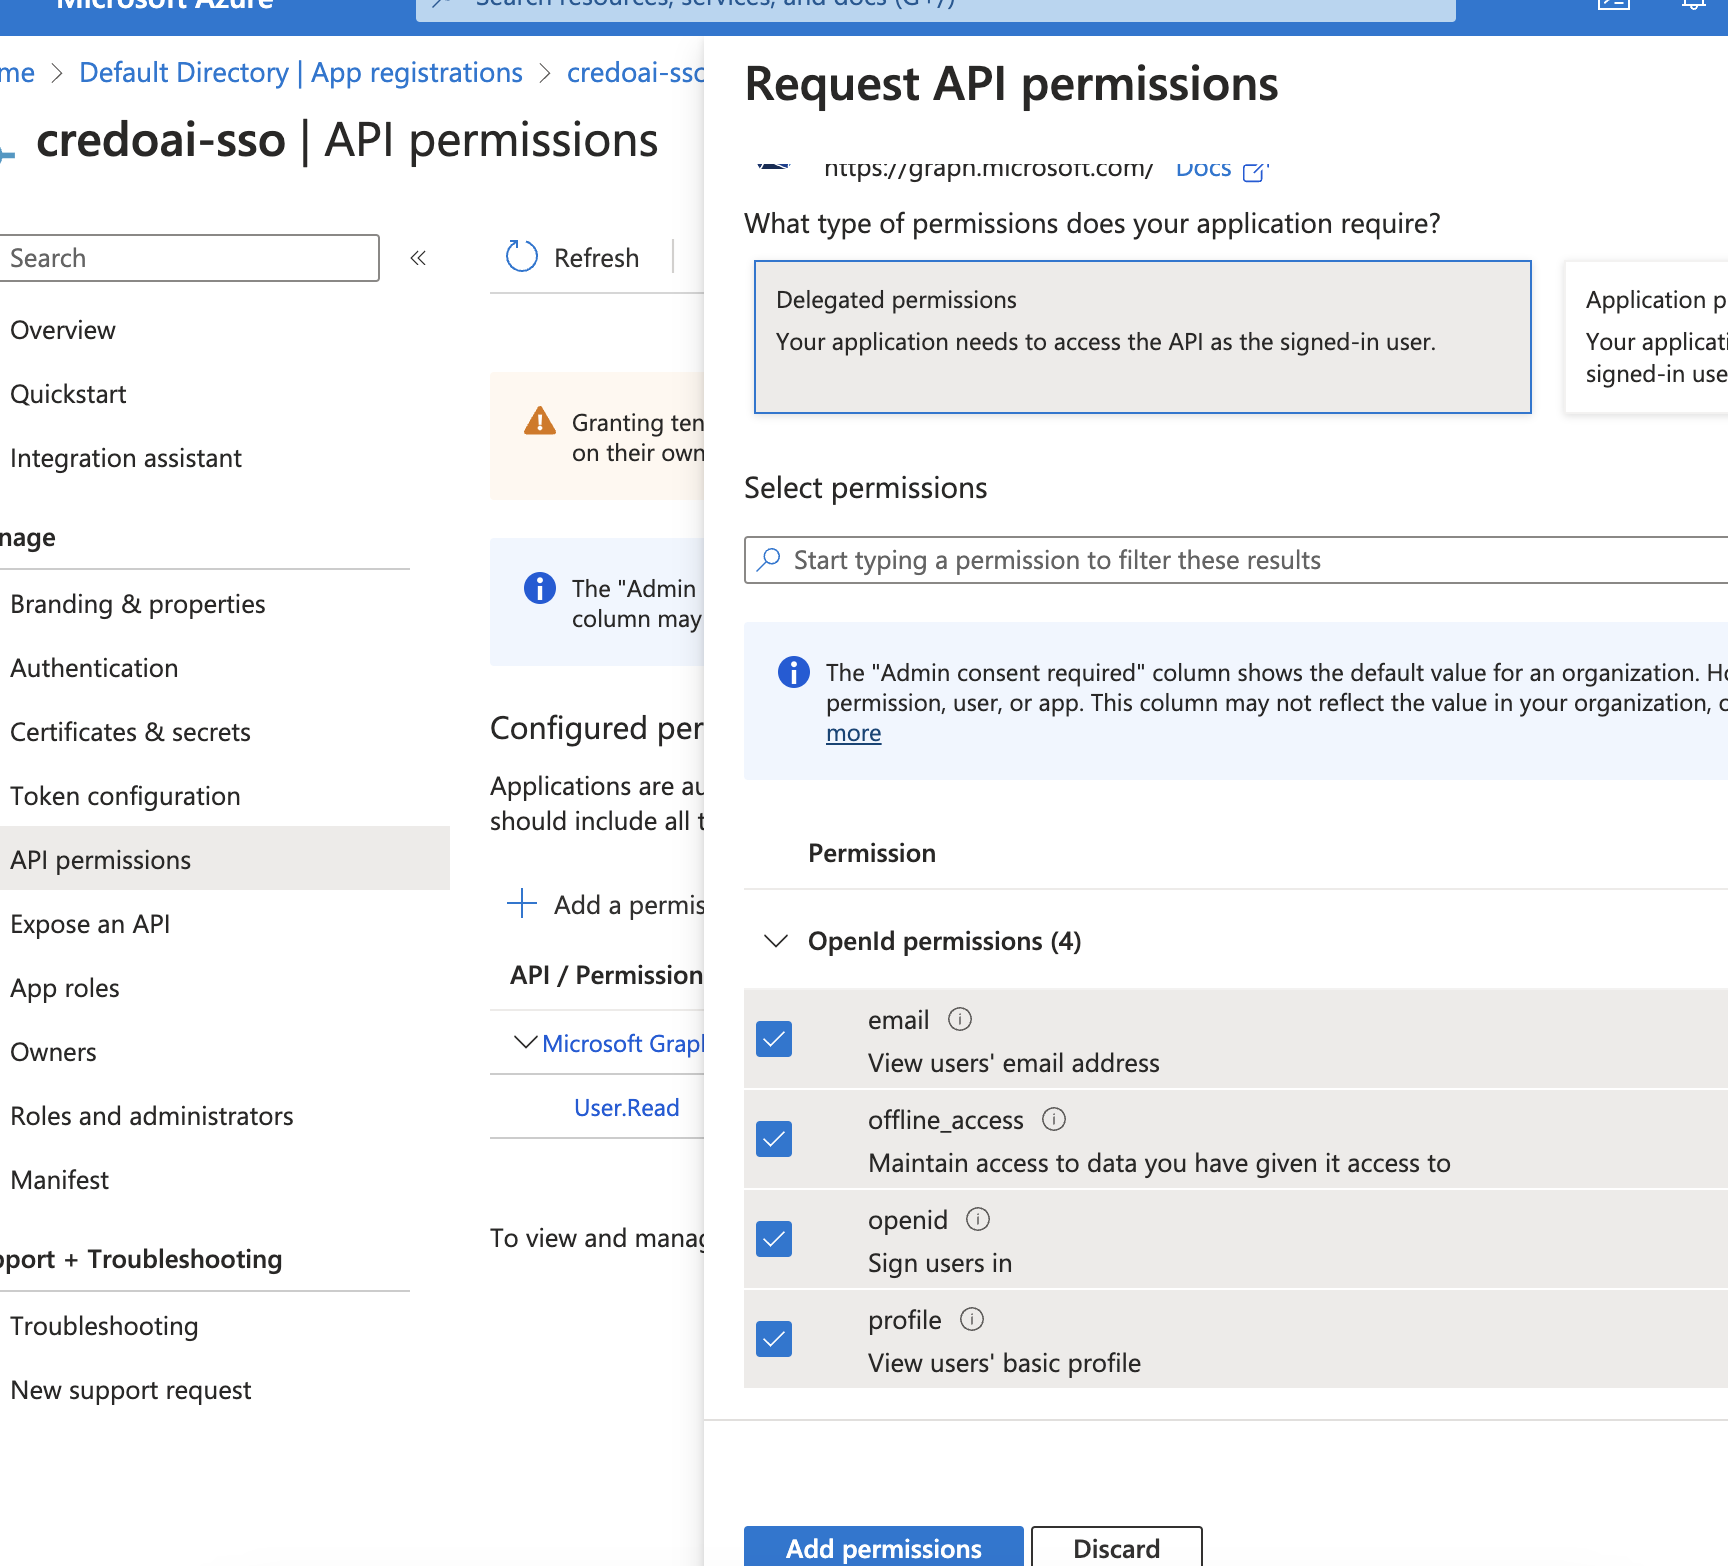
Click on Delegated permissions.
-
Select Permissions
Select the permissions to grant.
emailoffline_accessopenidprofile
-
Remove Unnecessary Permissions
Remove
User.Read.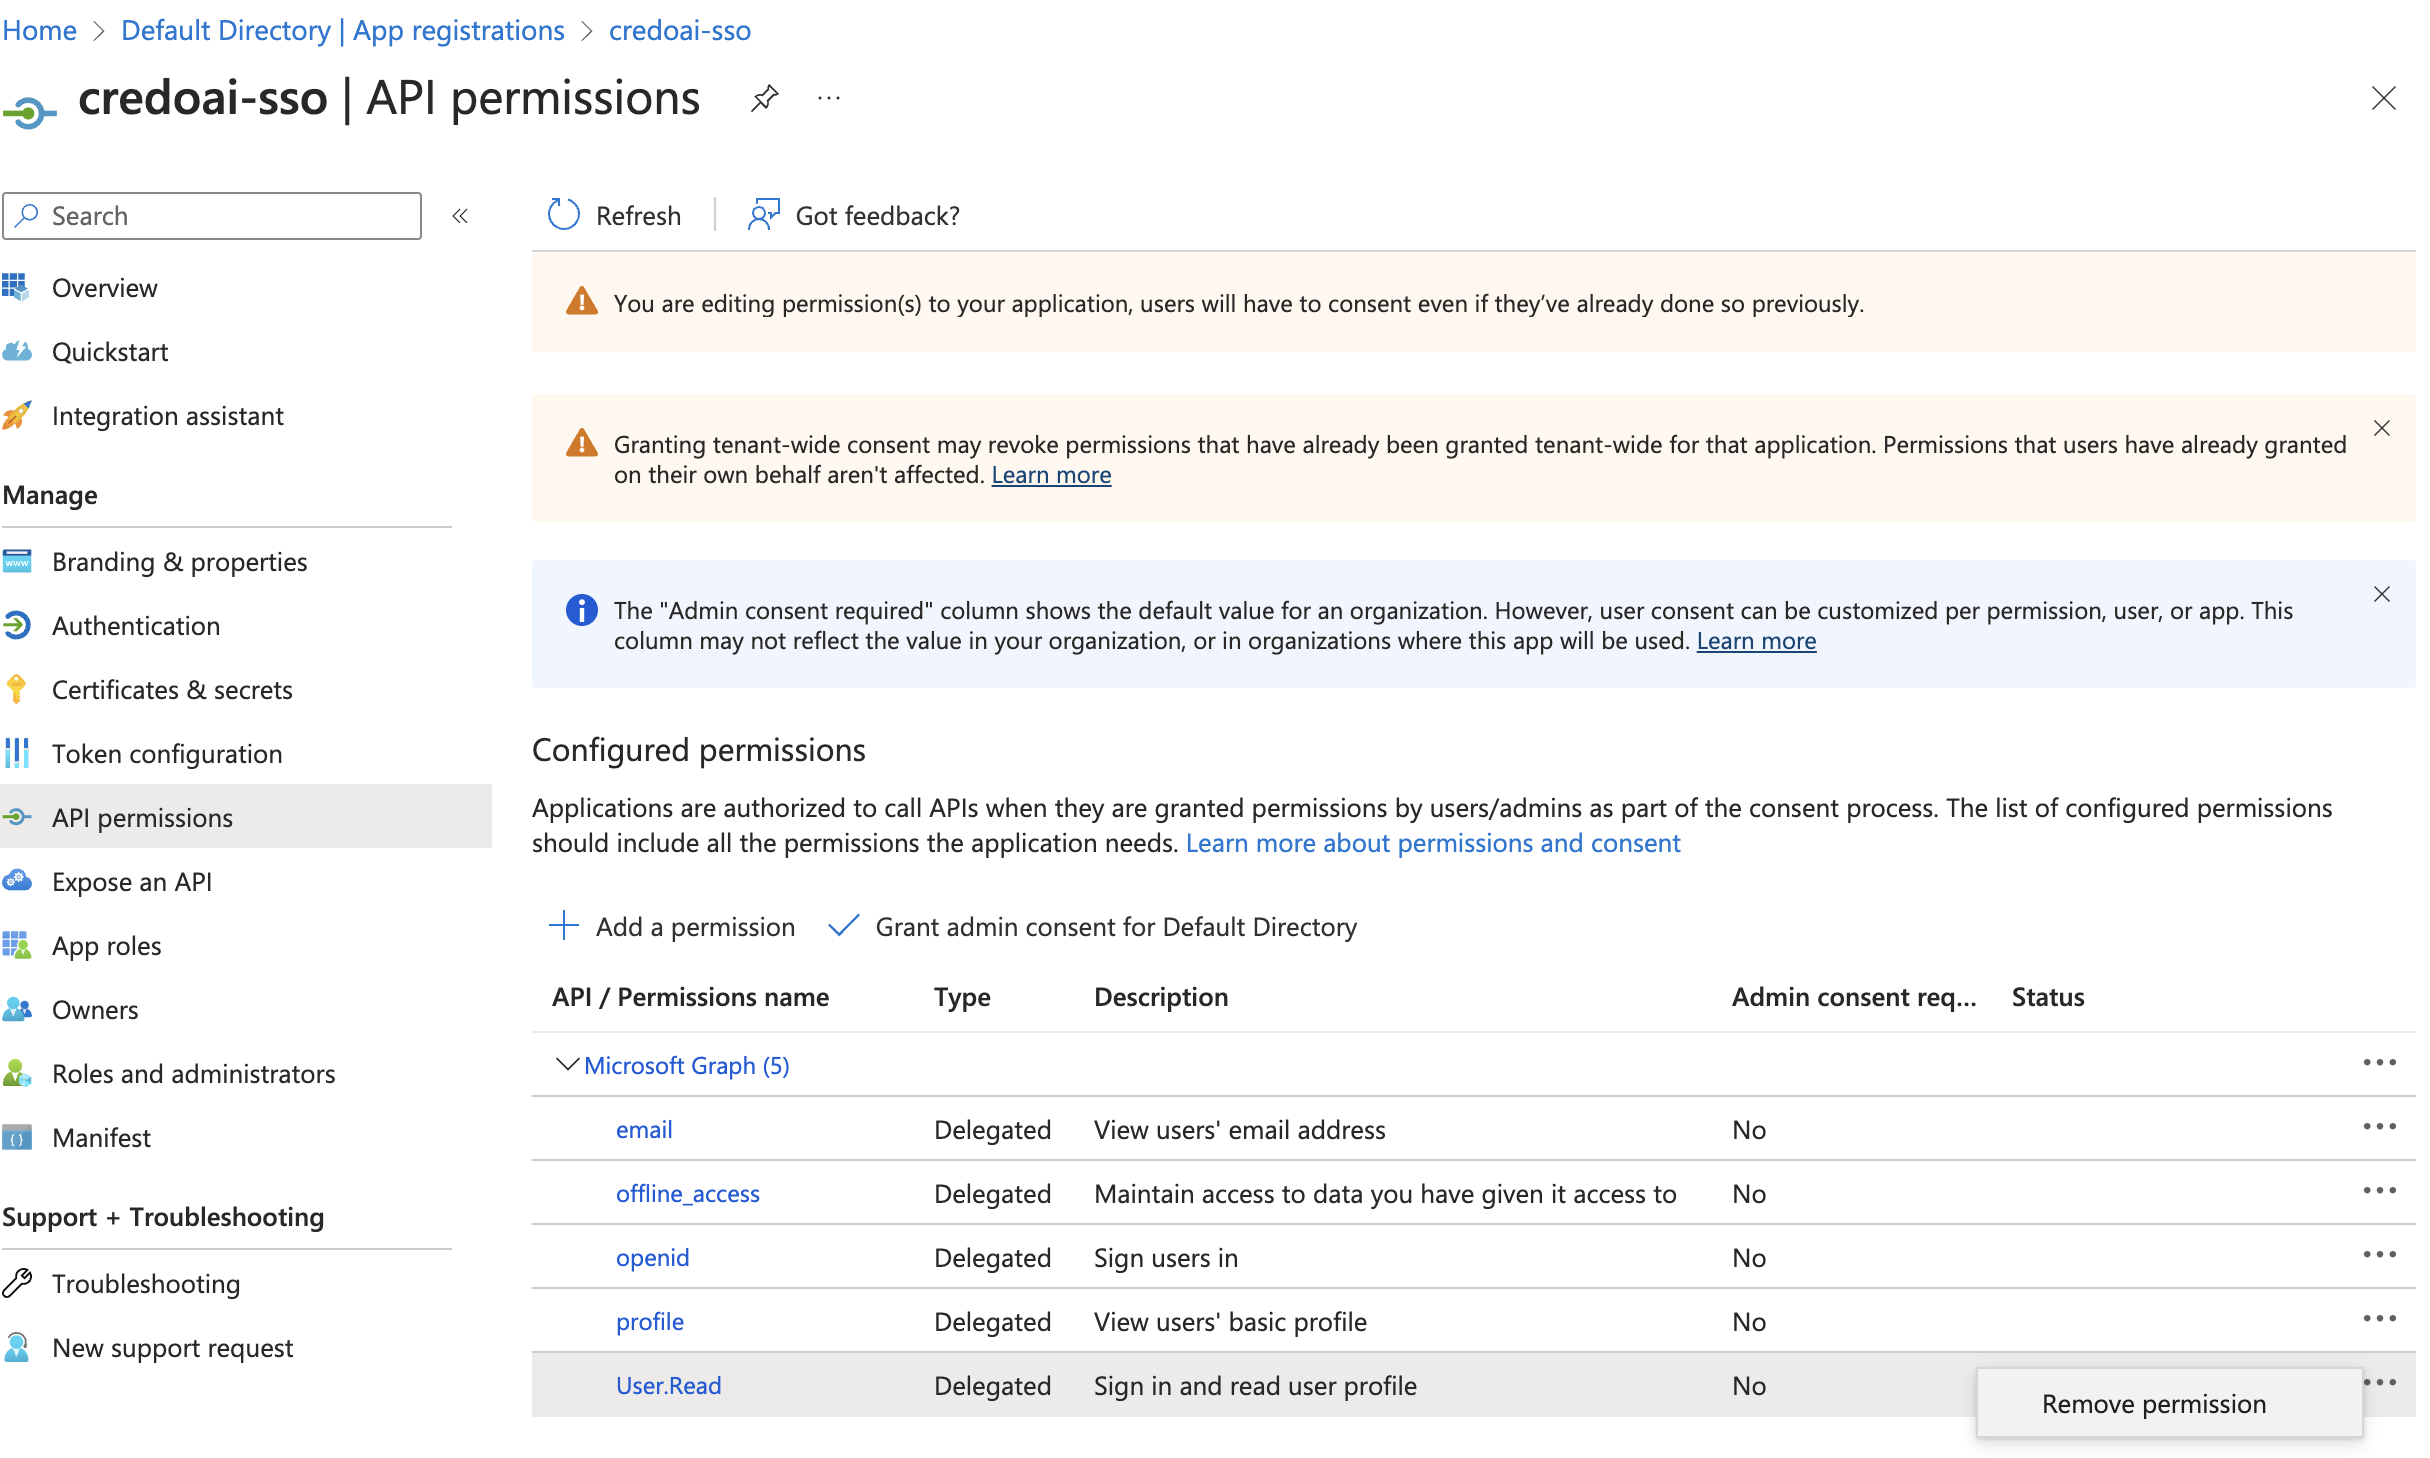
-
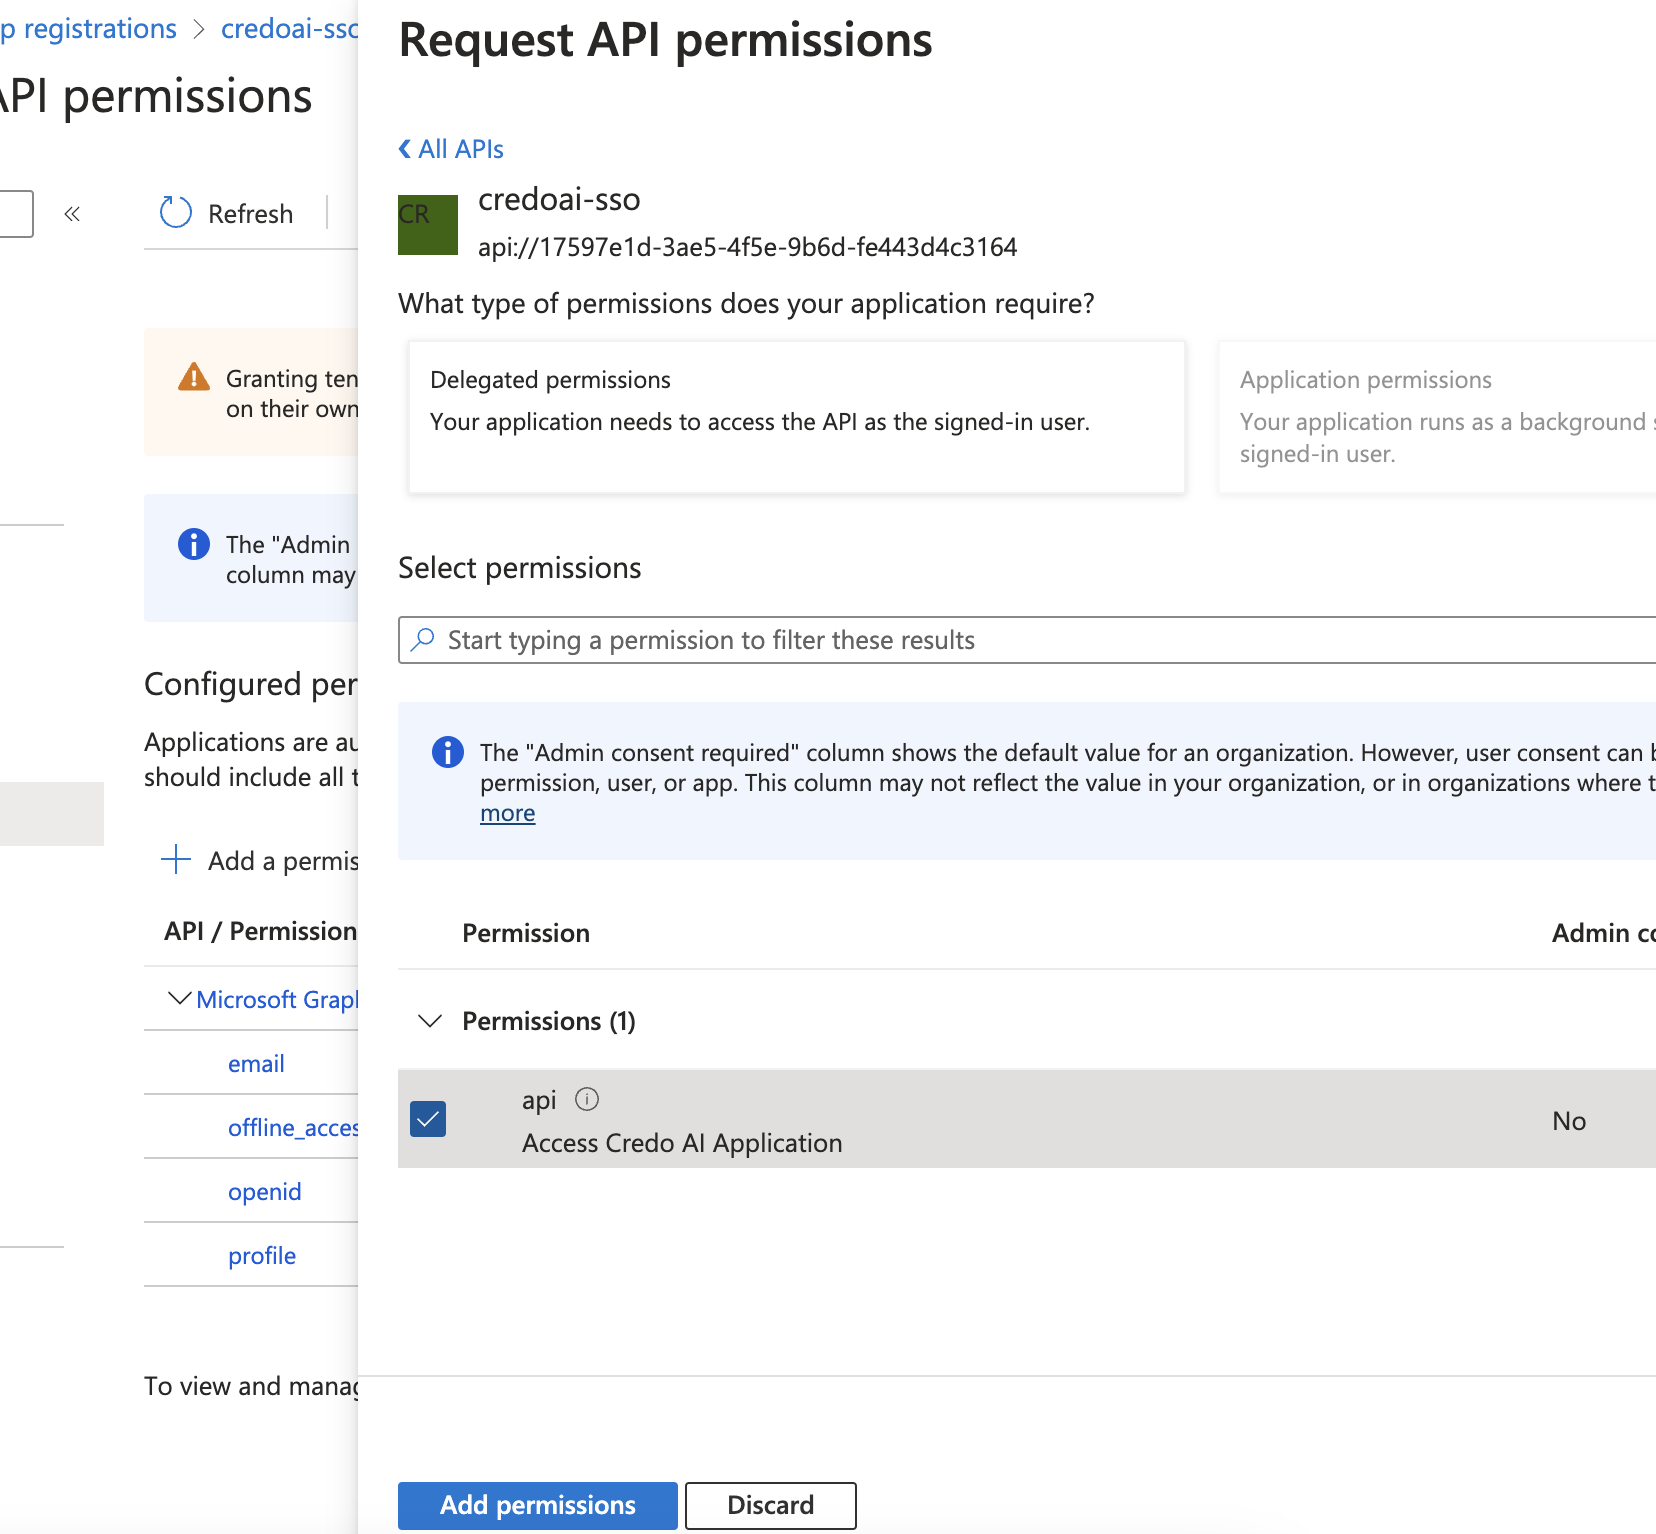
Request API Permissions
Click Add a permission.
Choose APIs my organization uses then select the application name you created earlier (e.g.,
credoai-sso).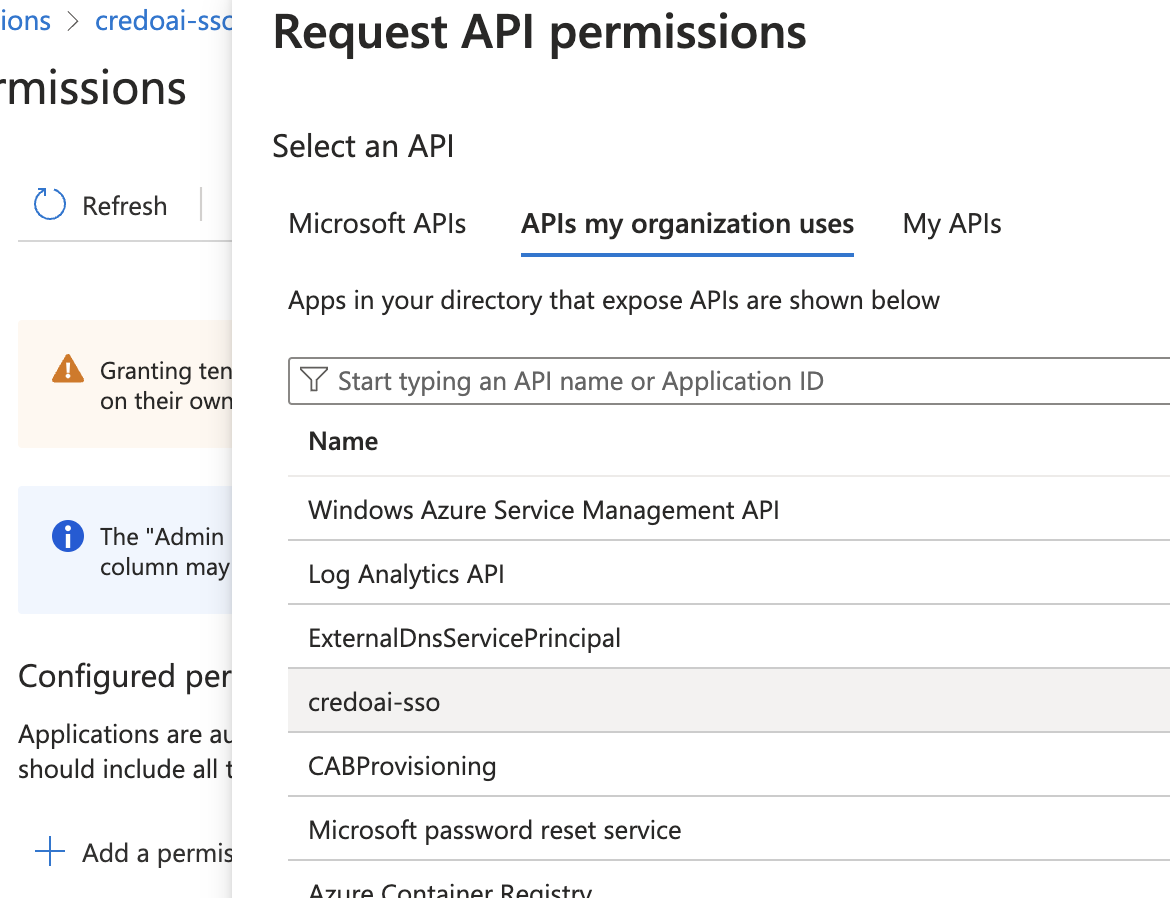
Select api from the list of permissions.
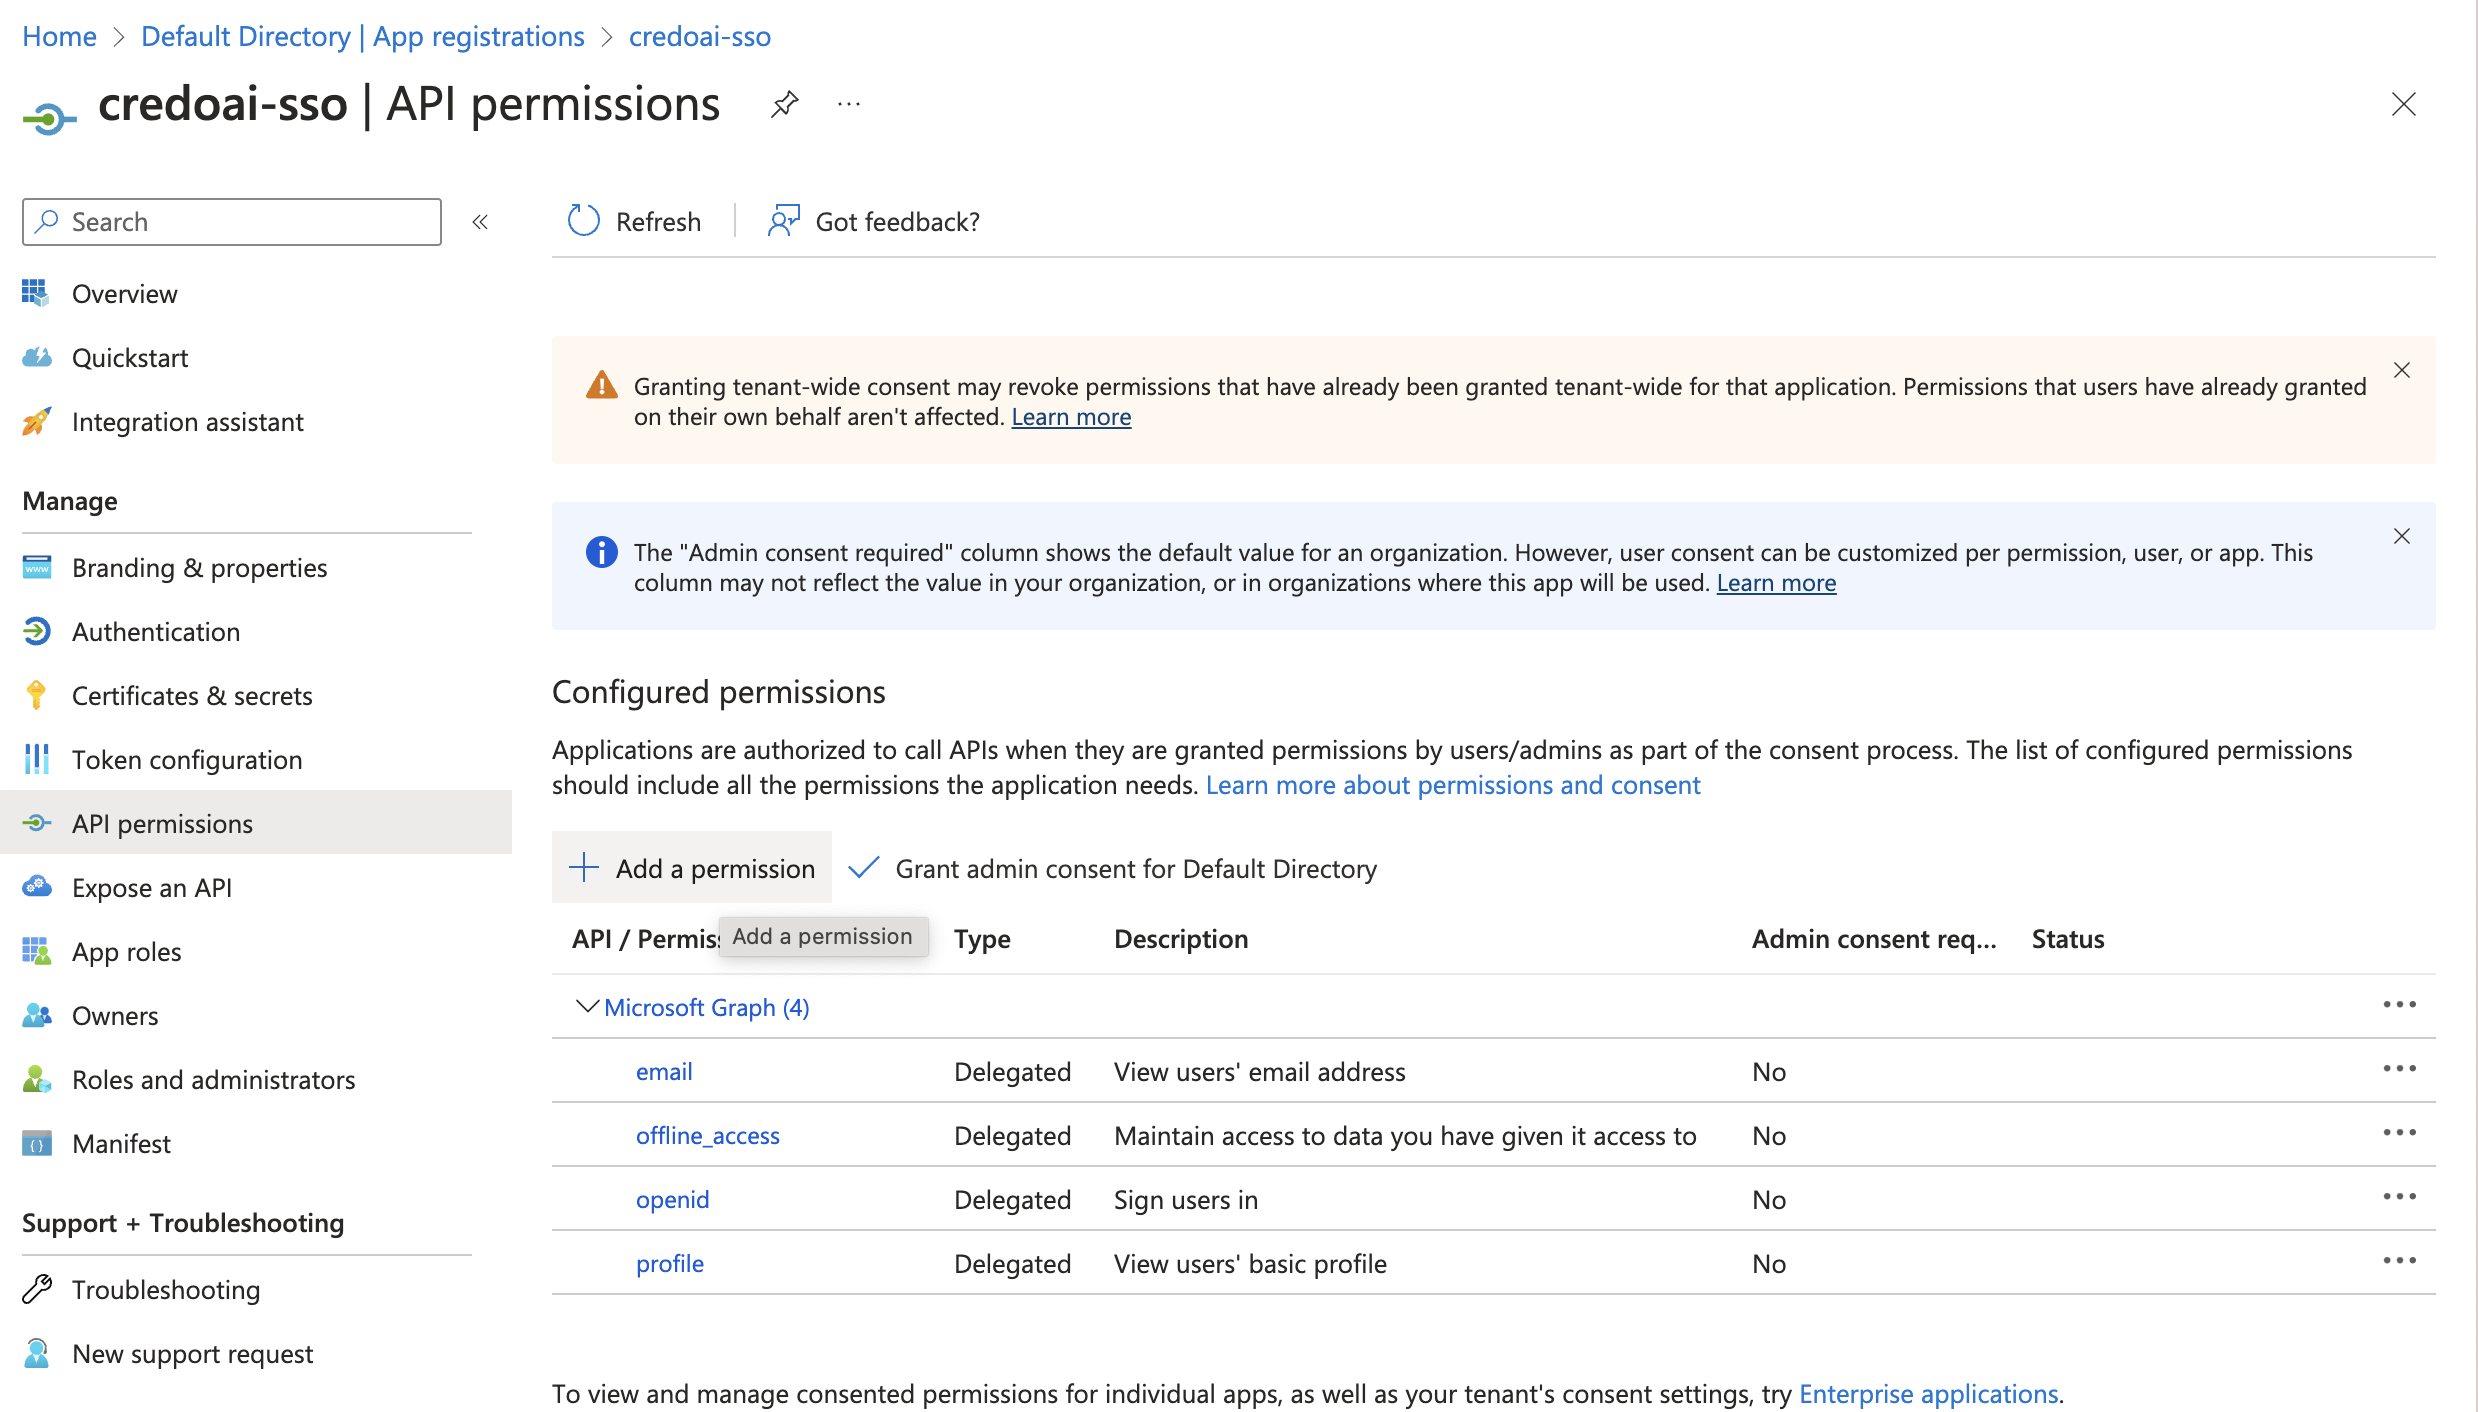
-
Verify Permissions The permissions should now be listed under API permissions.

Step 5: Configure Claims
-
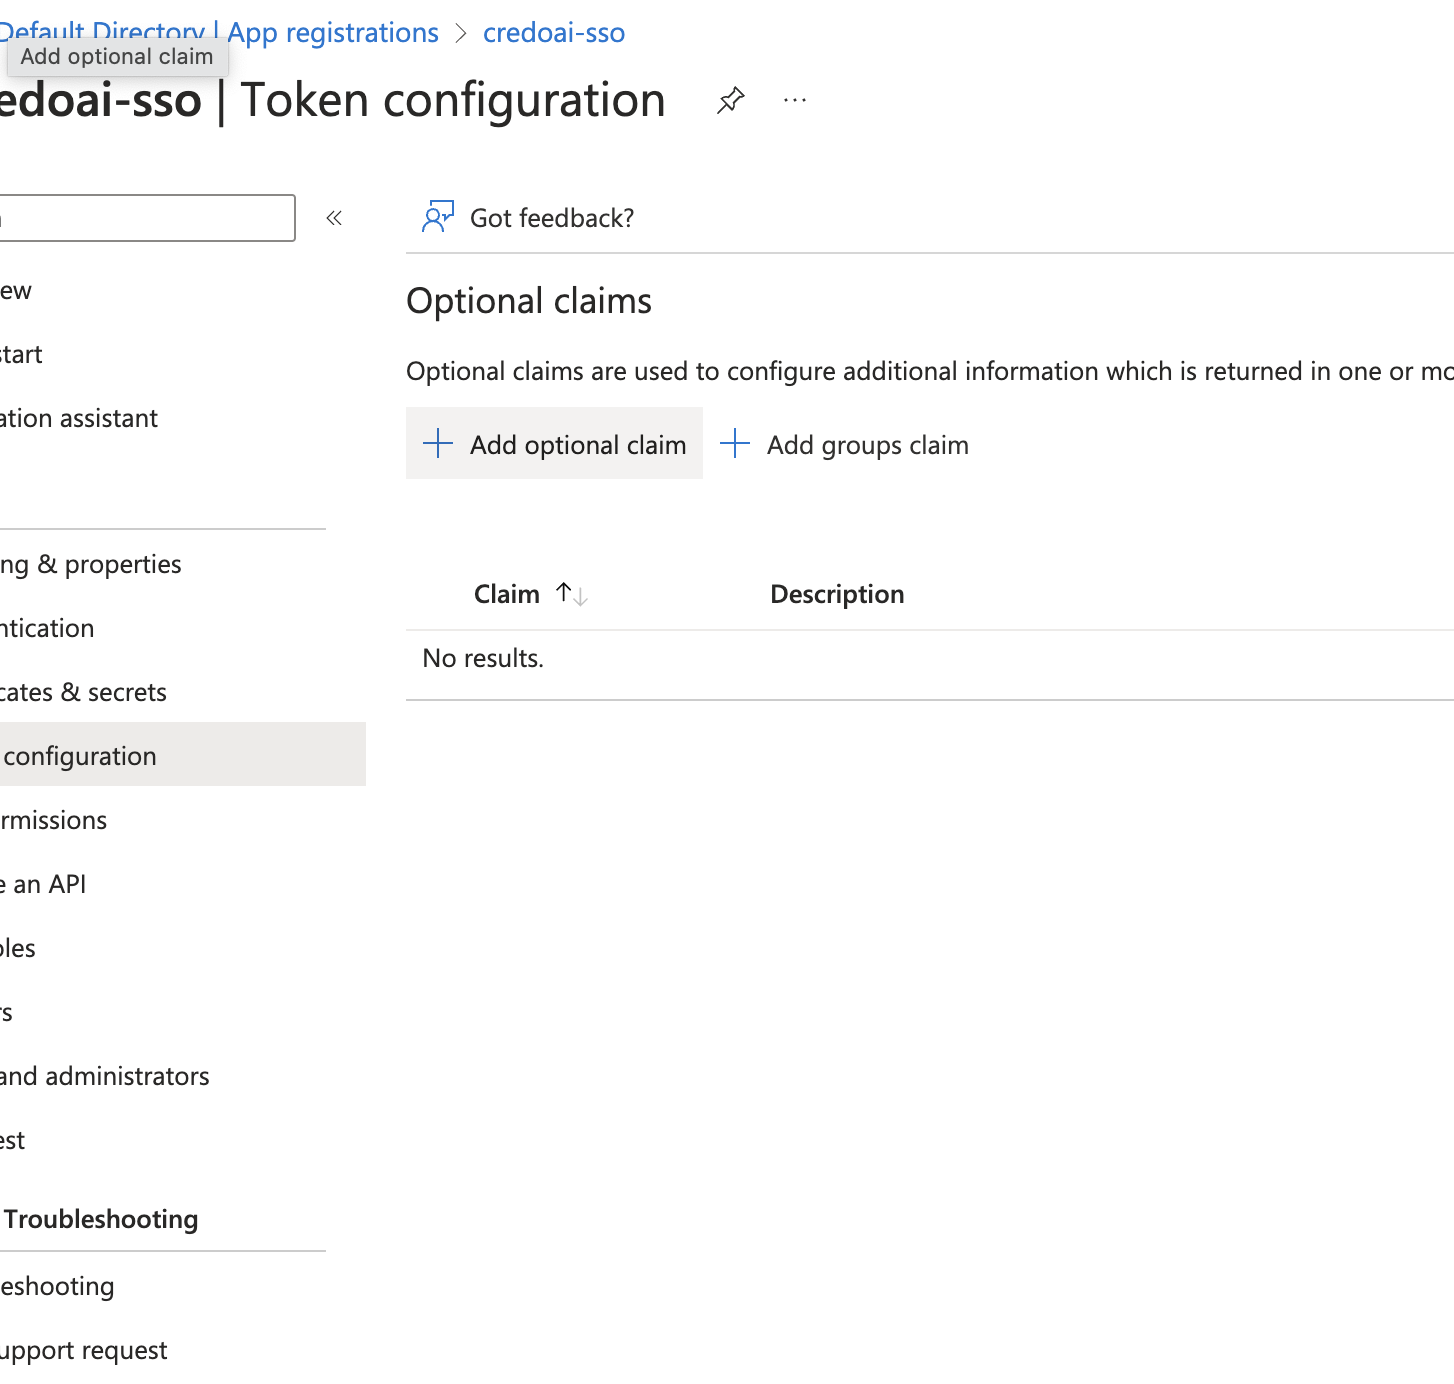
Navigate to Token Configuration
Go to Token configuration under Manage.
-
Add Claims
Click Add optional claim to configure additional information that will be included in the tokens.
-
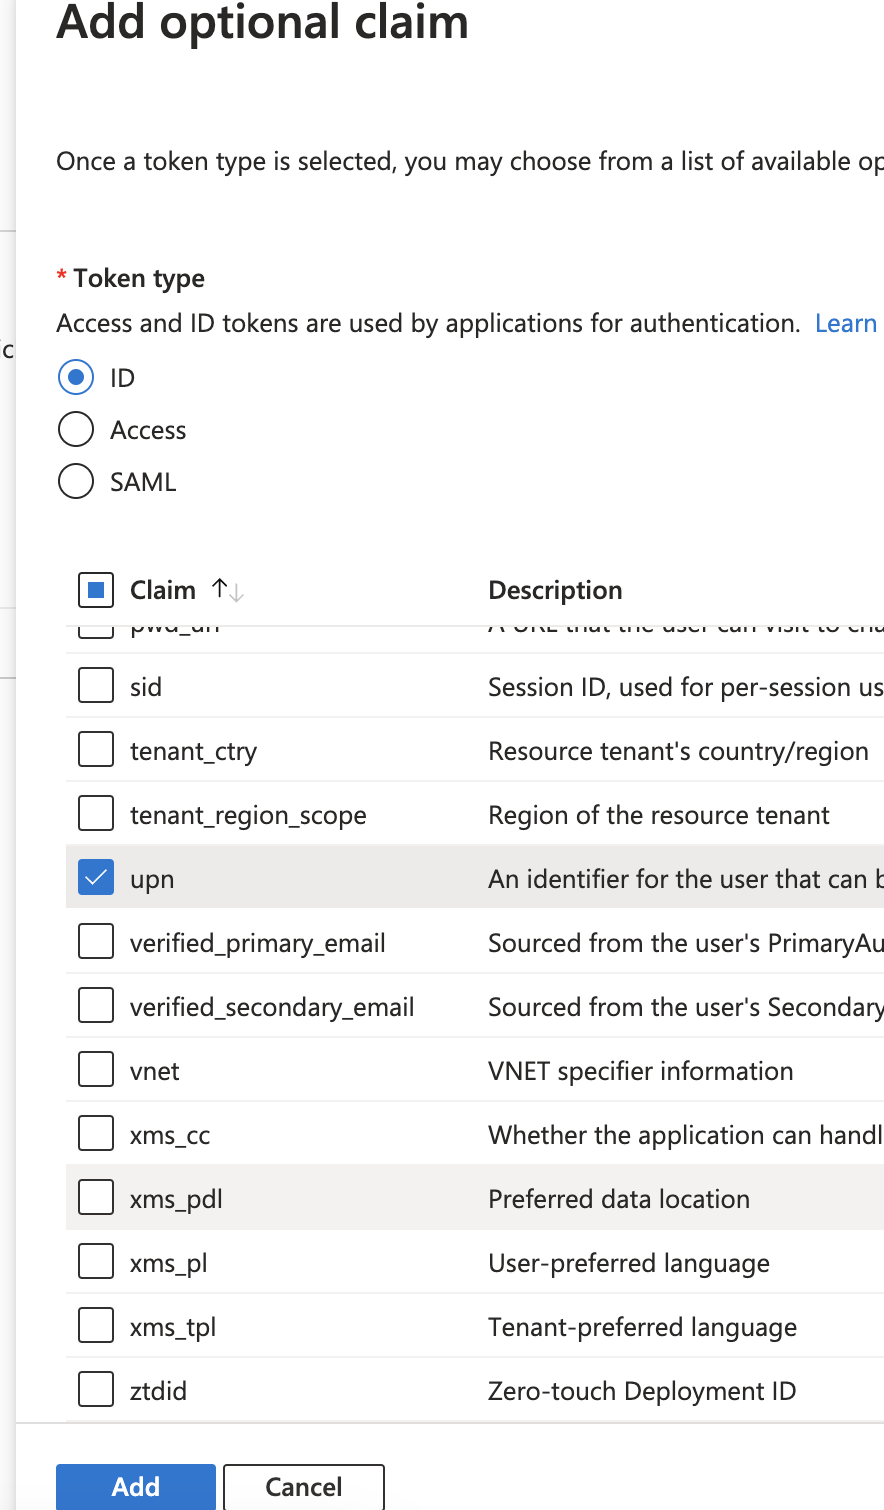
Select Claims for ID Token
- Token type: Choose ID.
- Select the claims
acct,email,family_name,given_name, andupn.
Click Add when done.

-
Repeat for Access Token
Click Add optional claim to configure additional information that will be included in the tokens.
- Token type: Choose Access.
- Select the claims
aud,email,family_name,given_name, andupn.
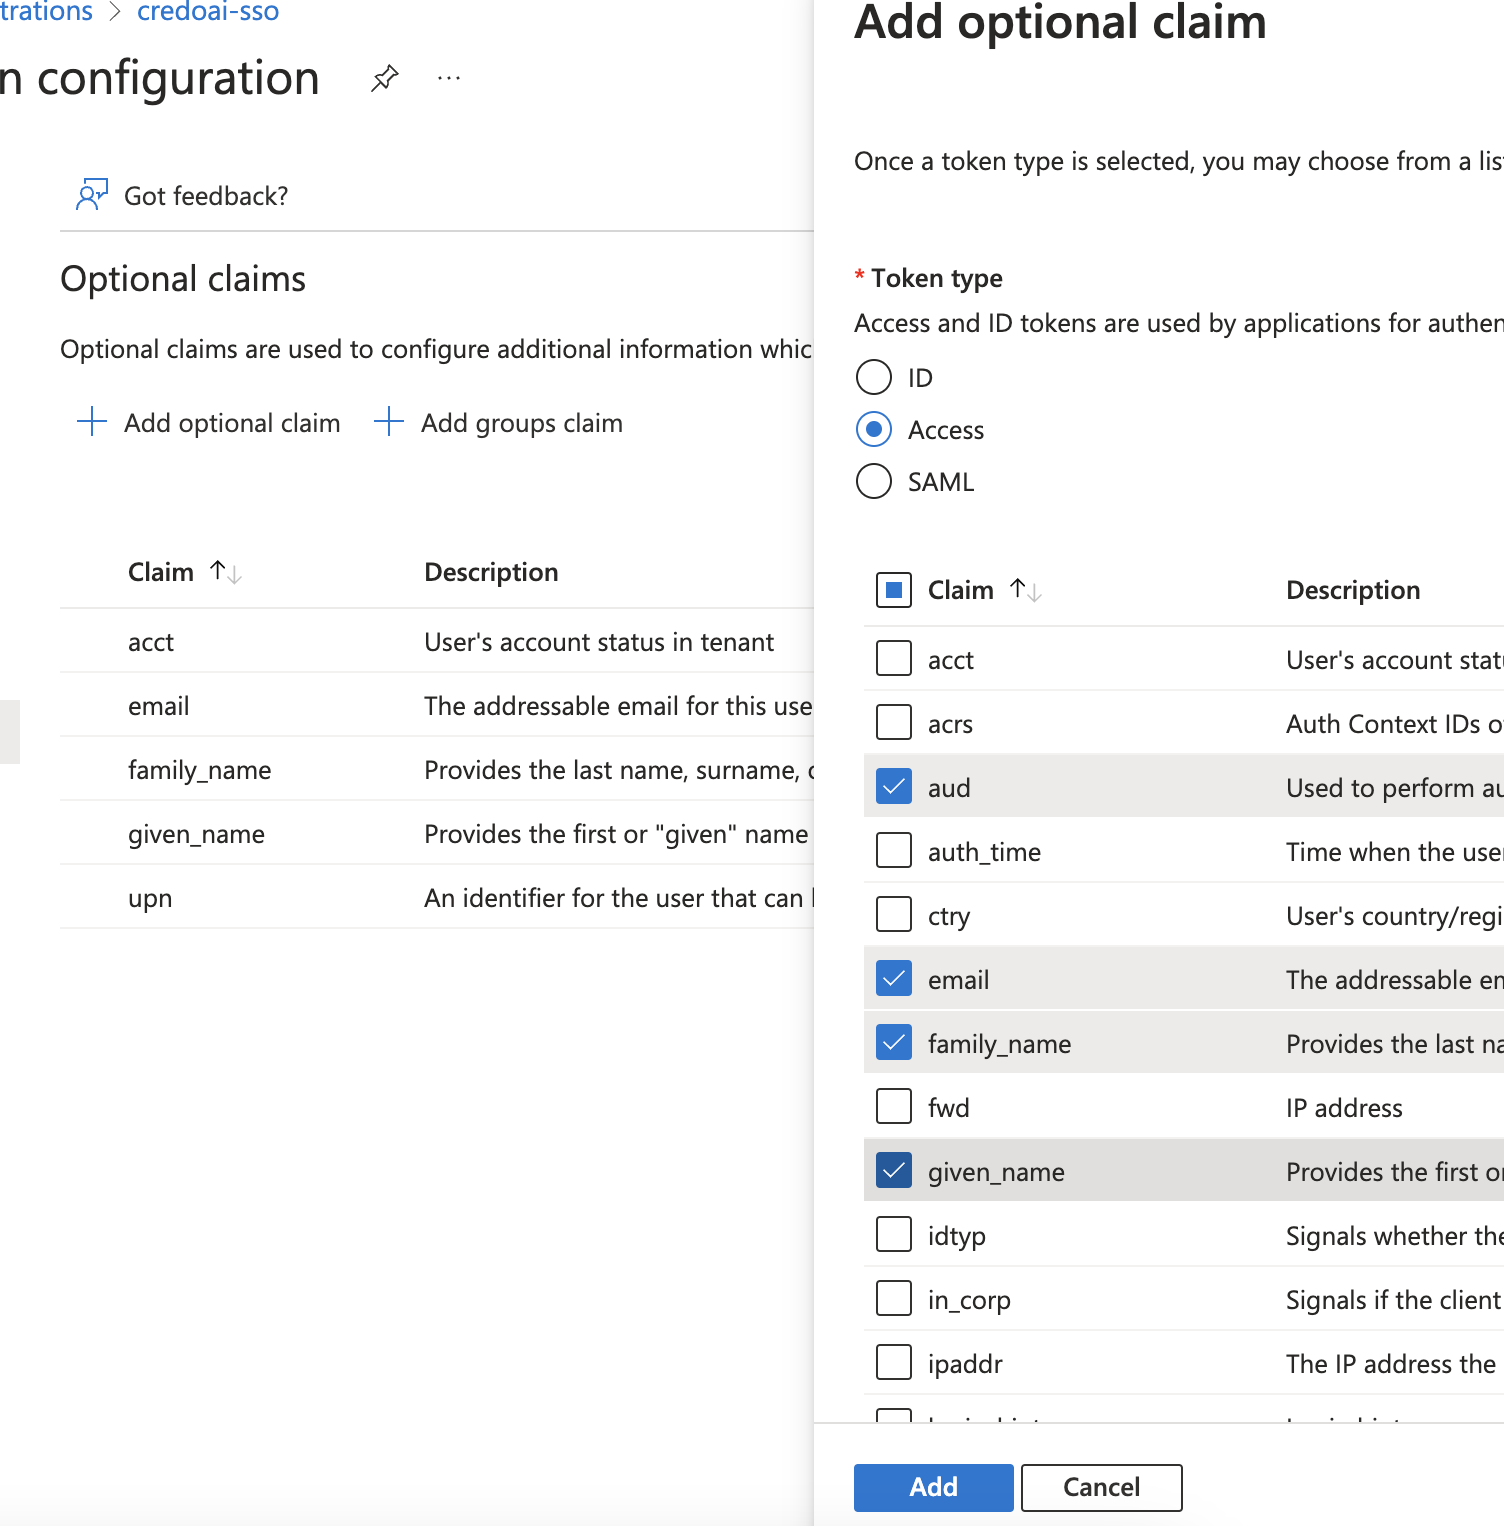
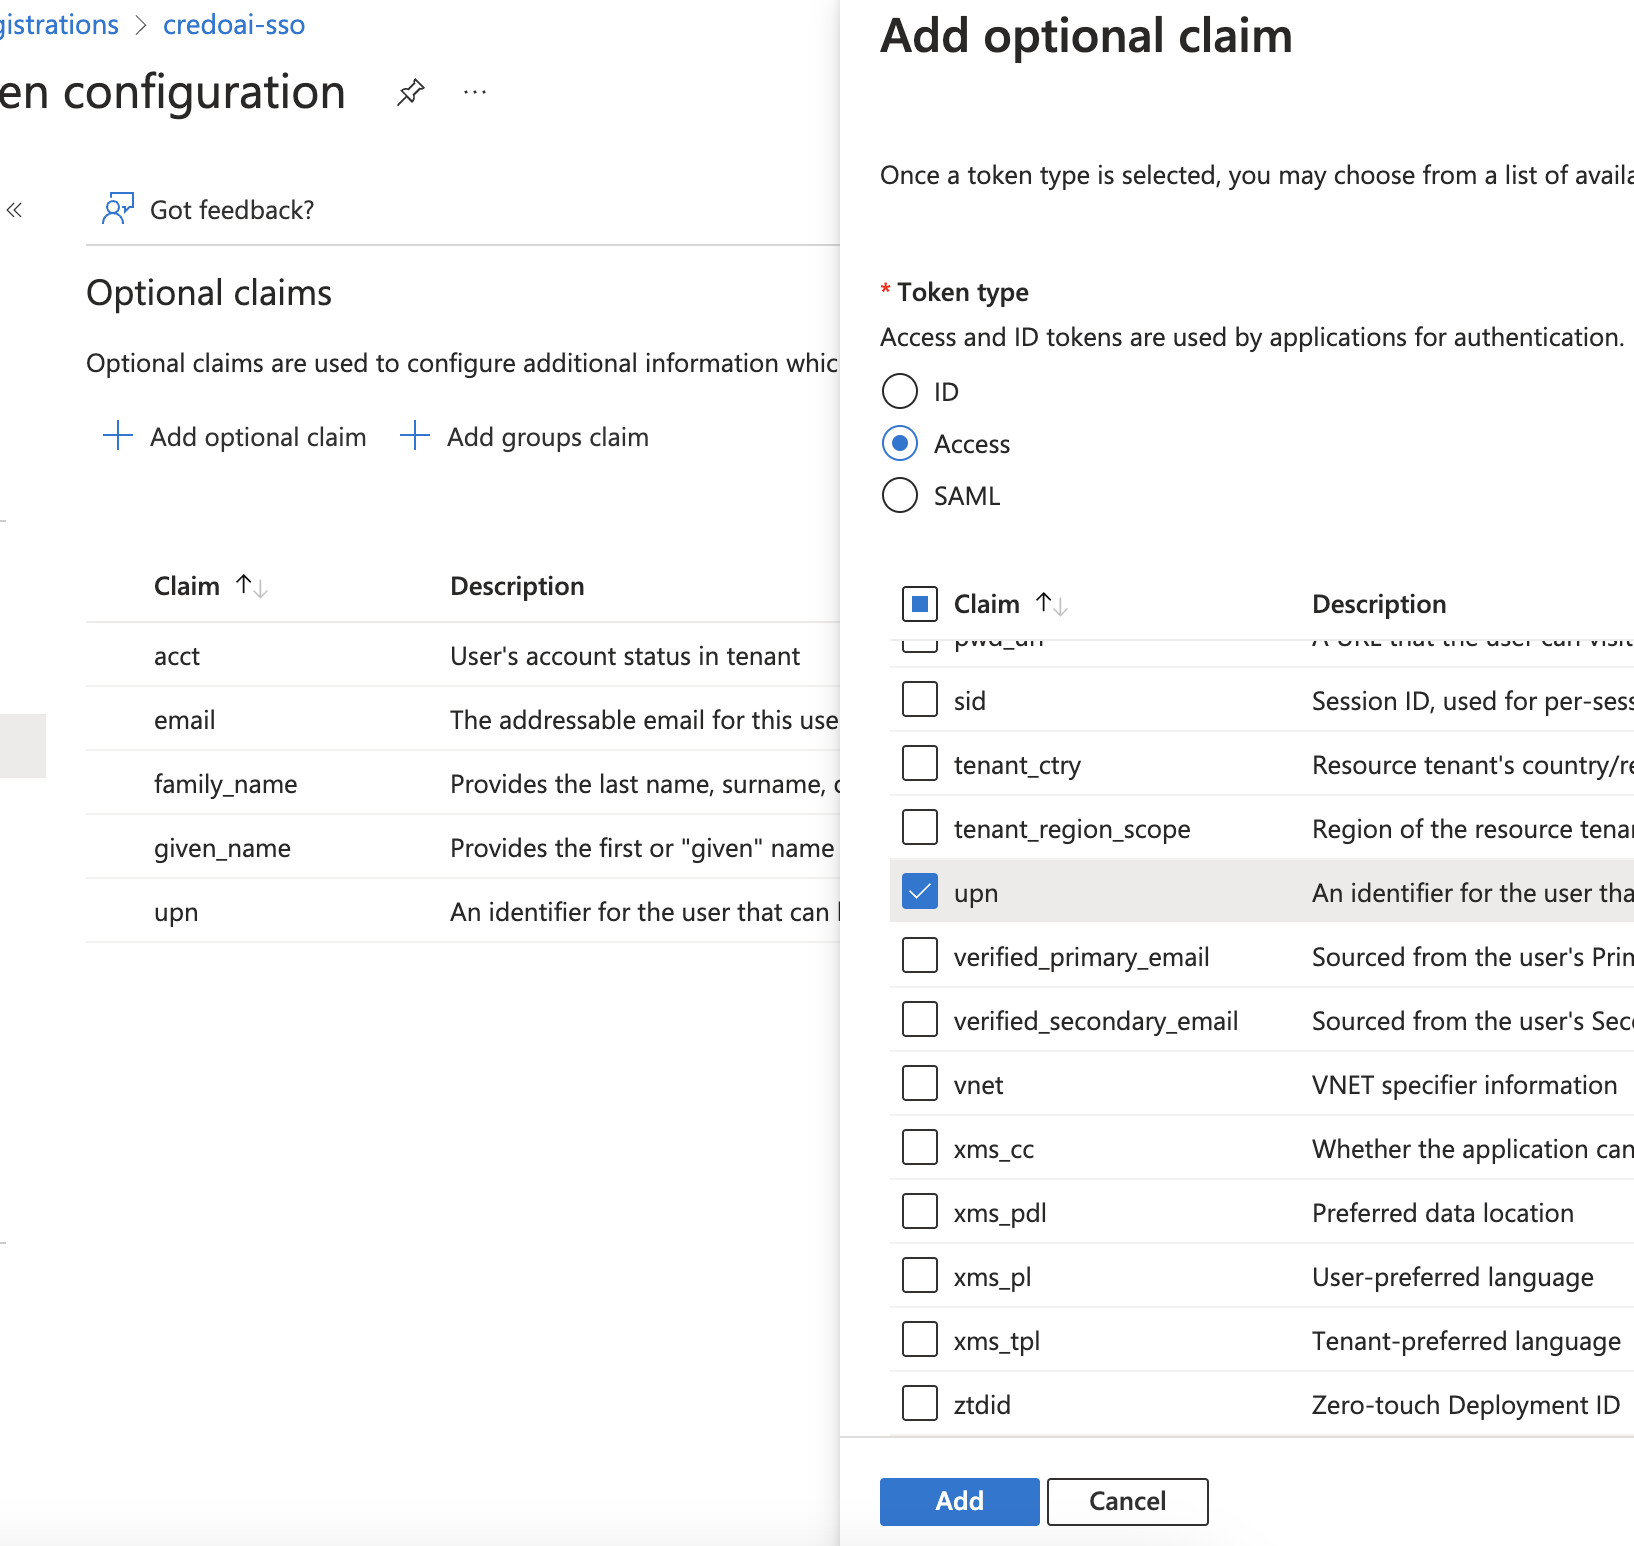
Click Add when done.
-
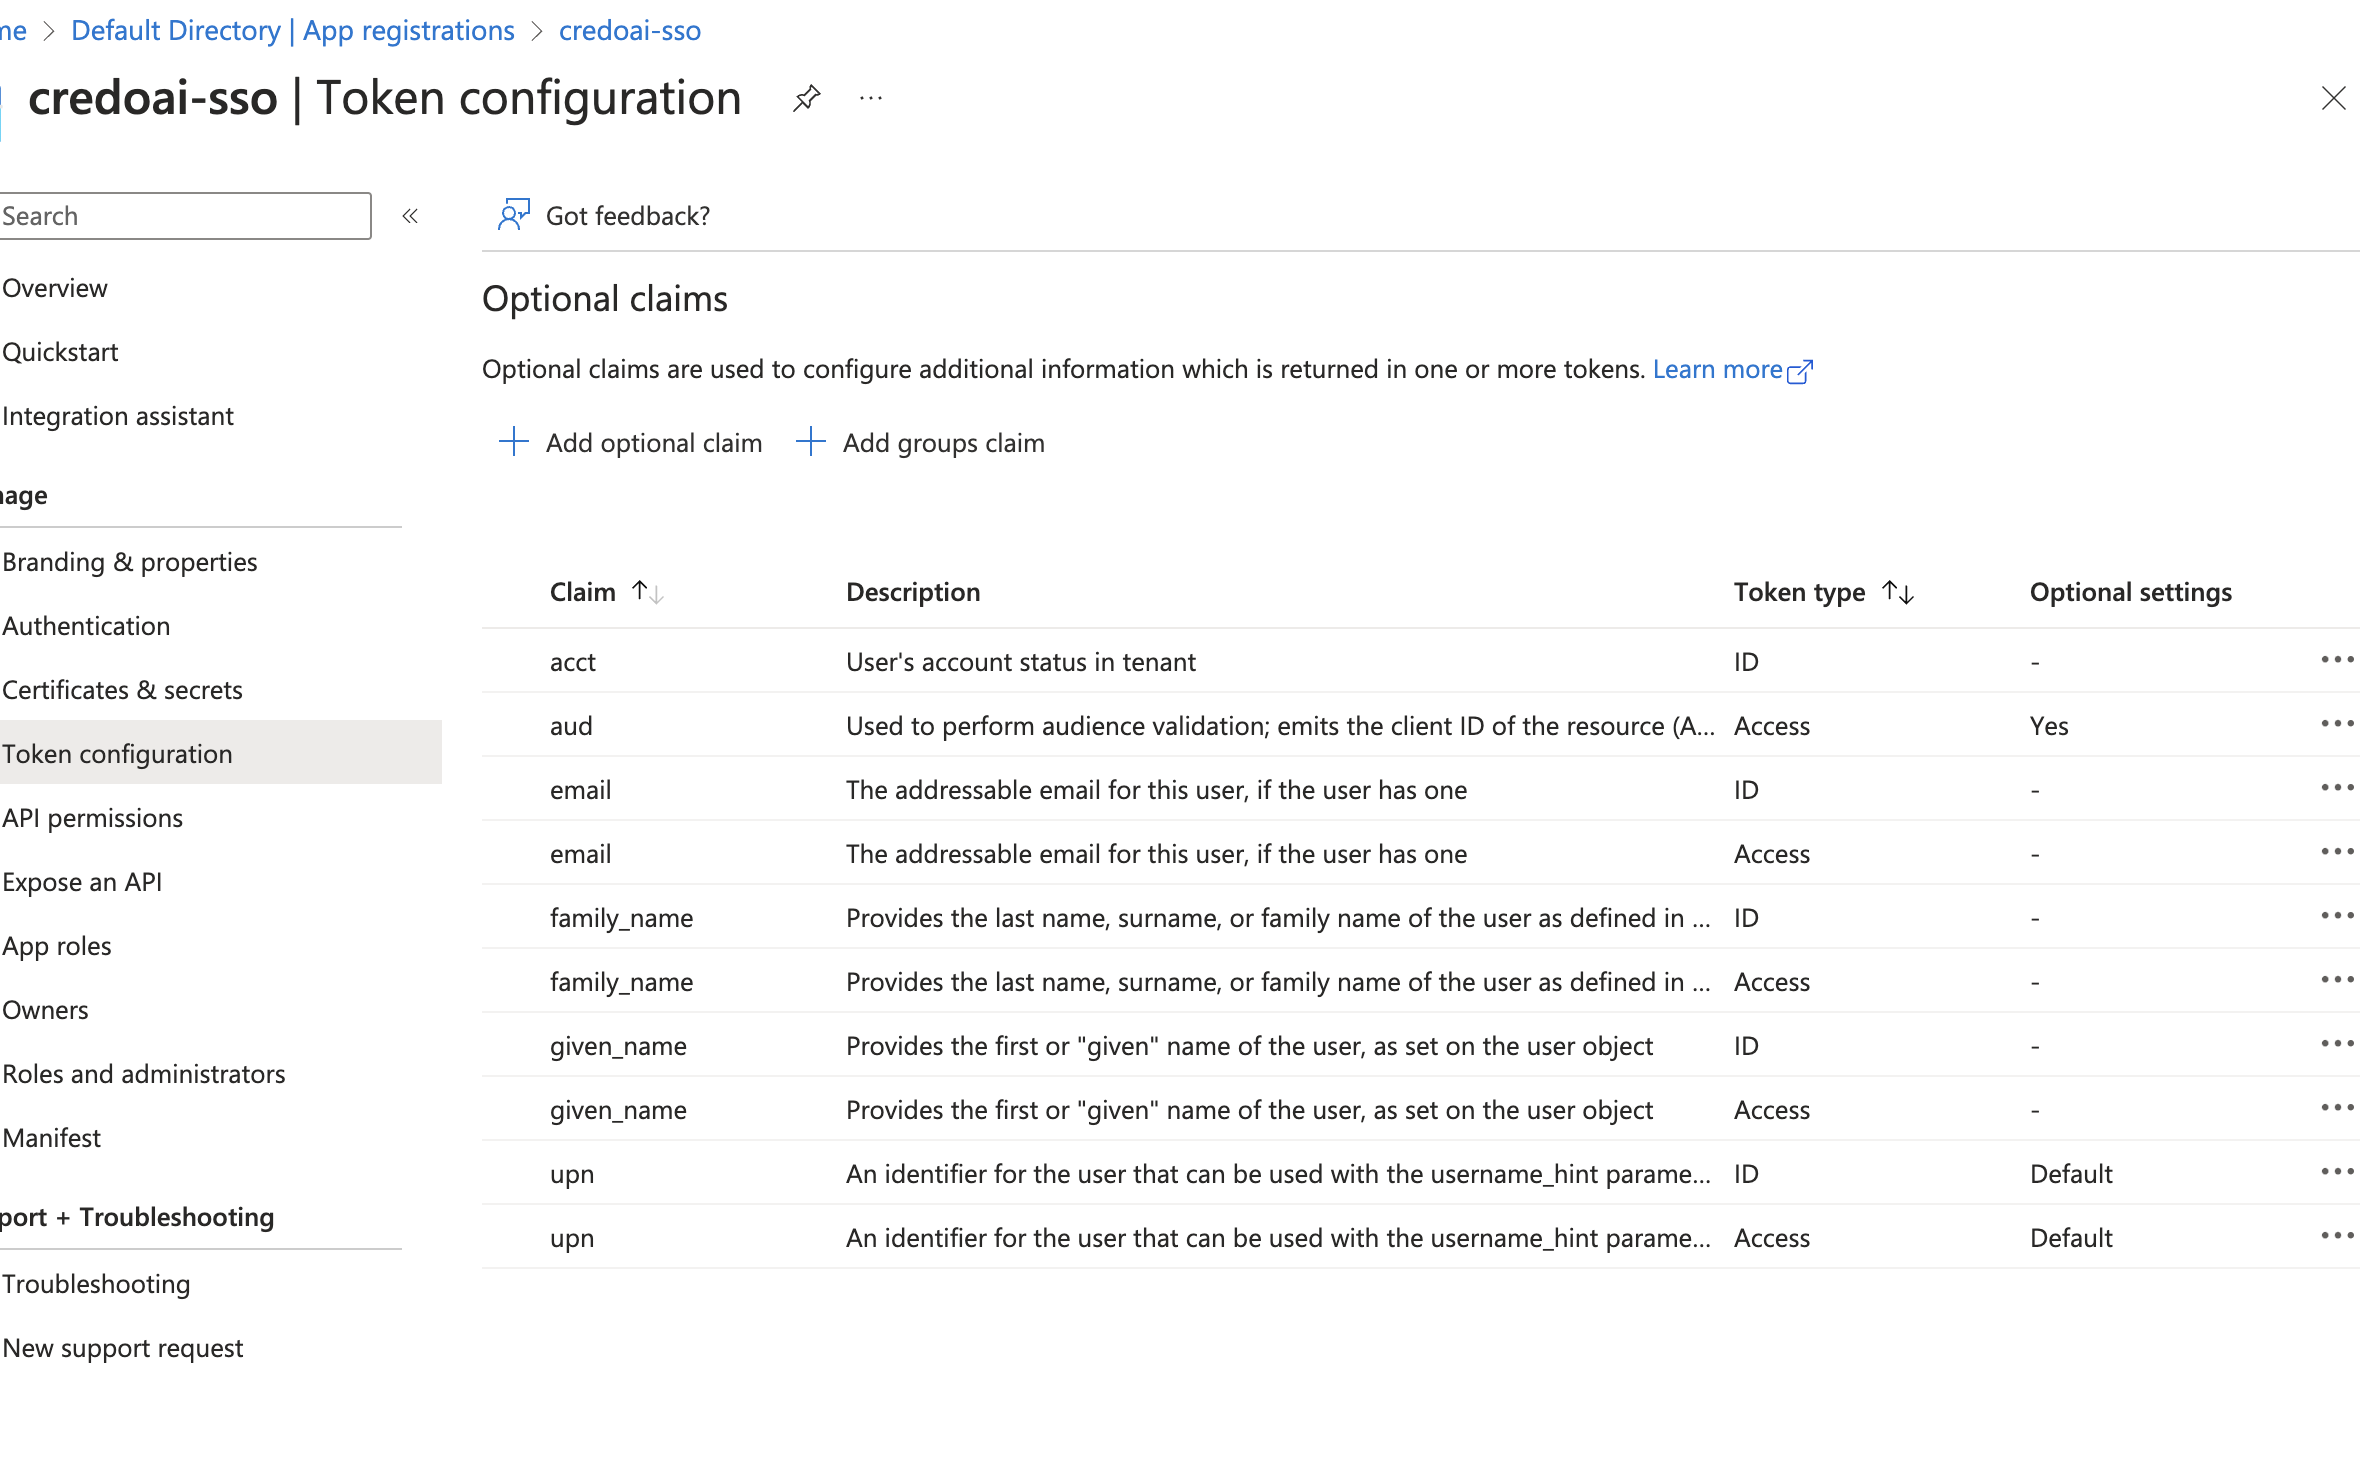
Verify Claims
The claims should now be listed under Token configuration.
Step 6: Review Application Overview
-
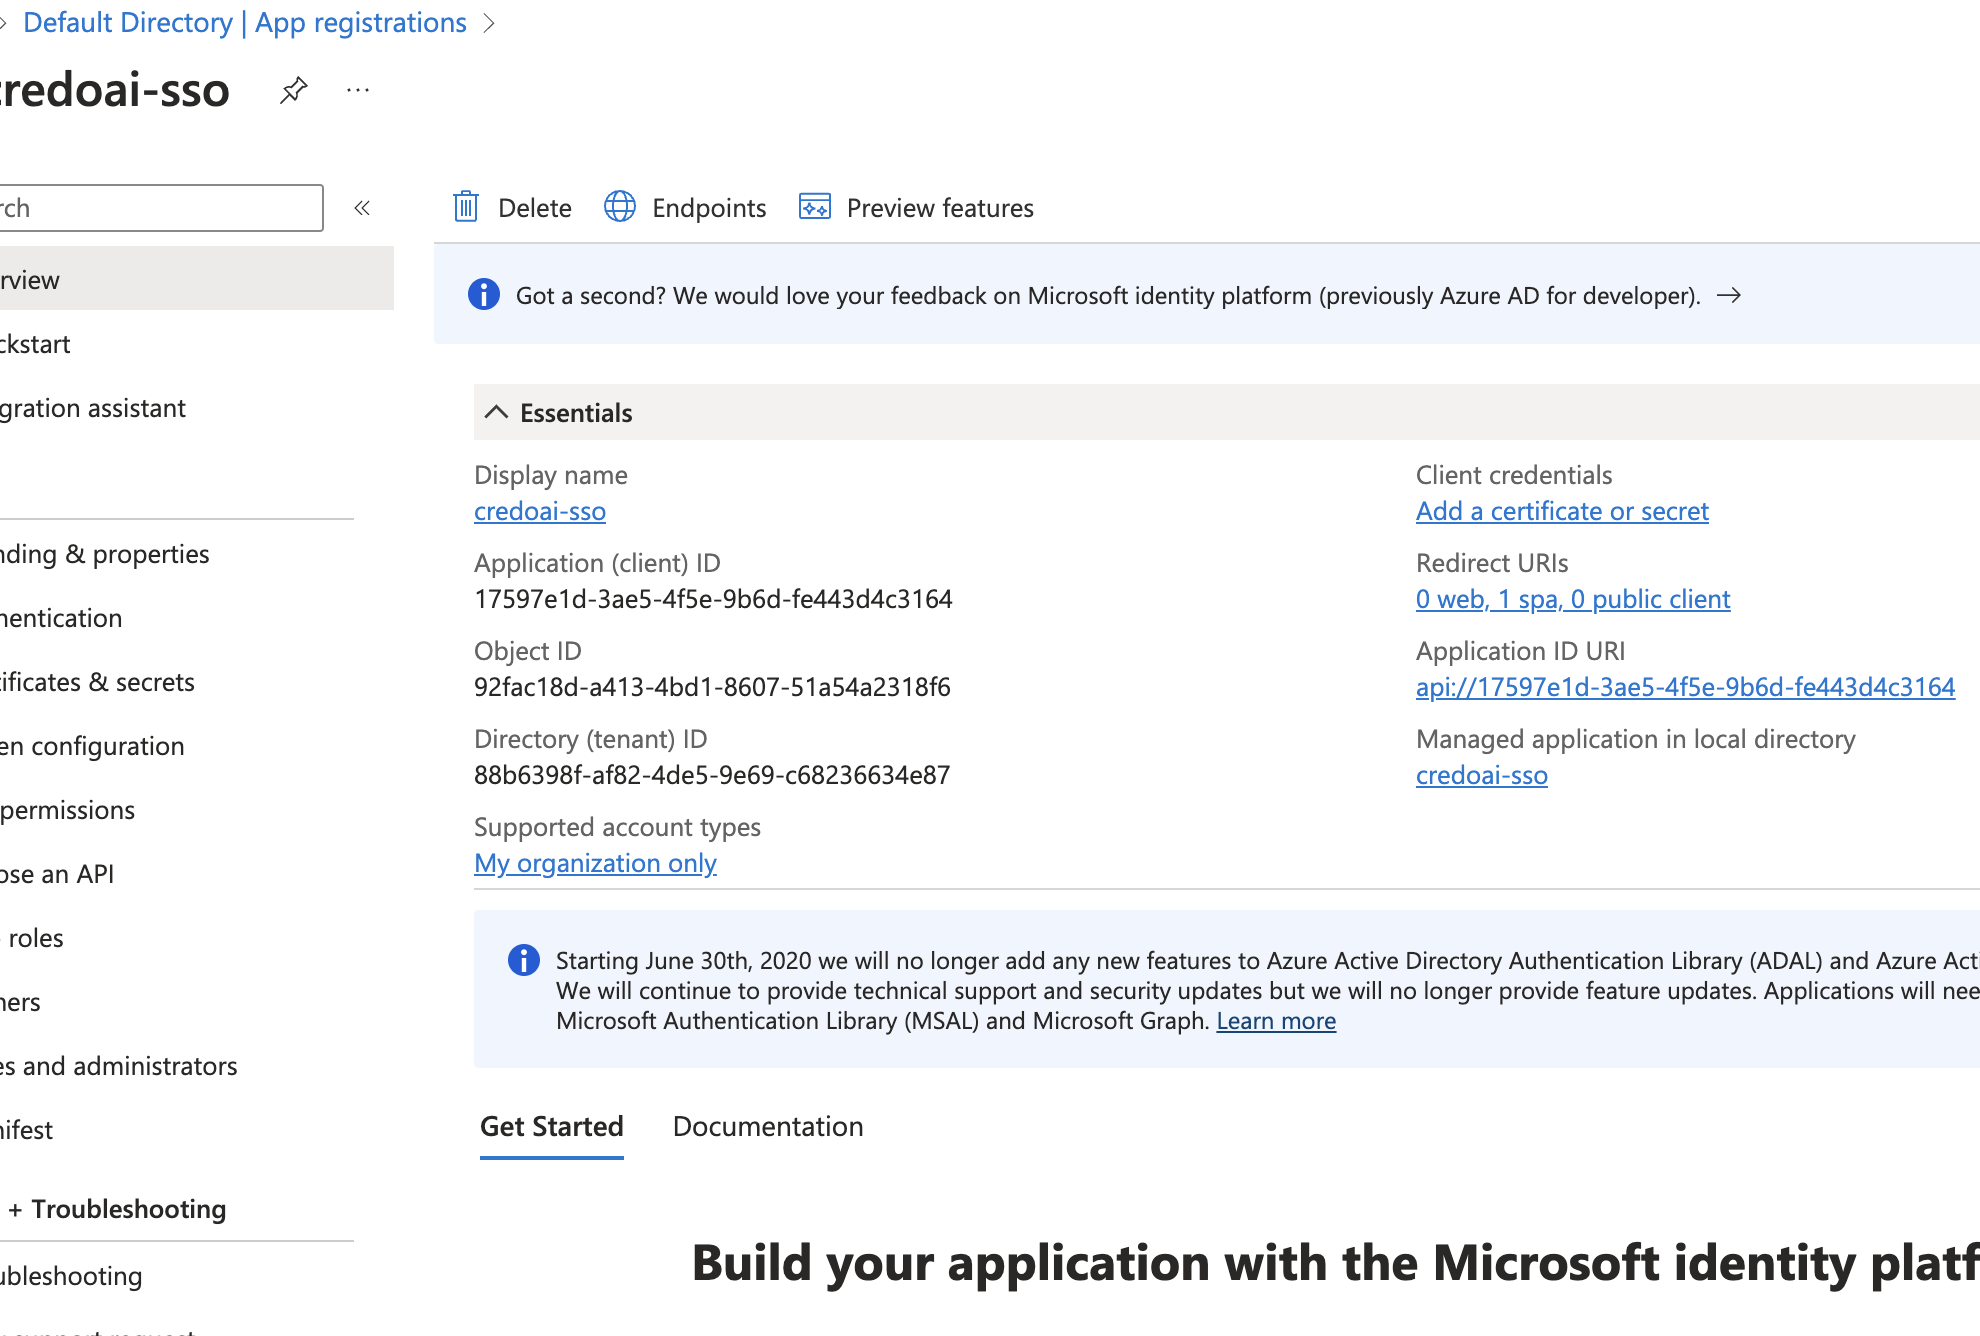
Application Essentials
Go to the Overview section to review essential details like Application (client) ID, Directory (tenant) ID, and other important information.
Step 7: Update Application Manifest
-
Modify the Manifest
We suggest enabling version 2 of token endpoint. To do this, you will need to update the manifest directly. Go to the Manifest section.
Find
accessTokenAcceptedVersionand set it to2.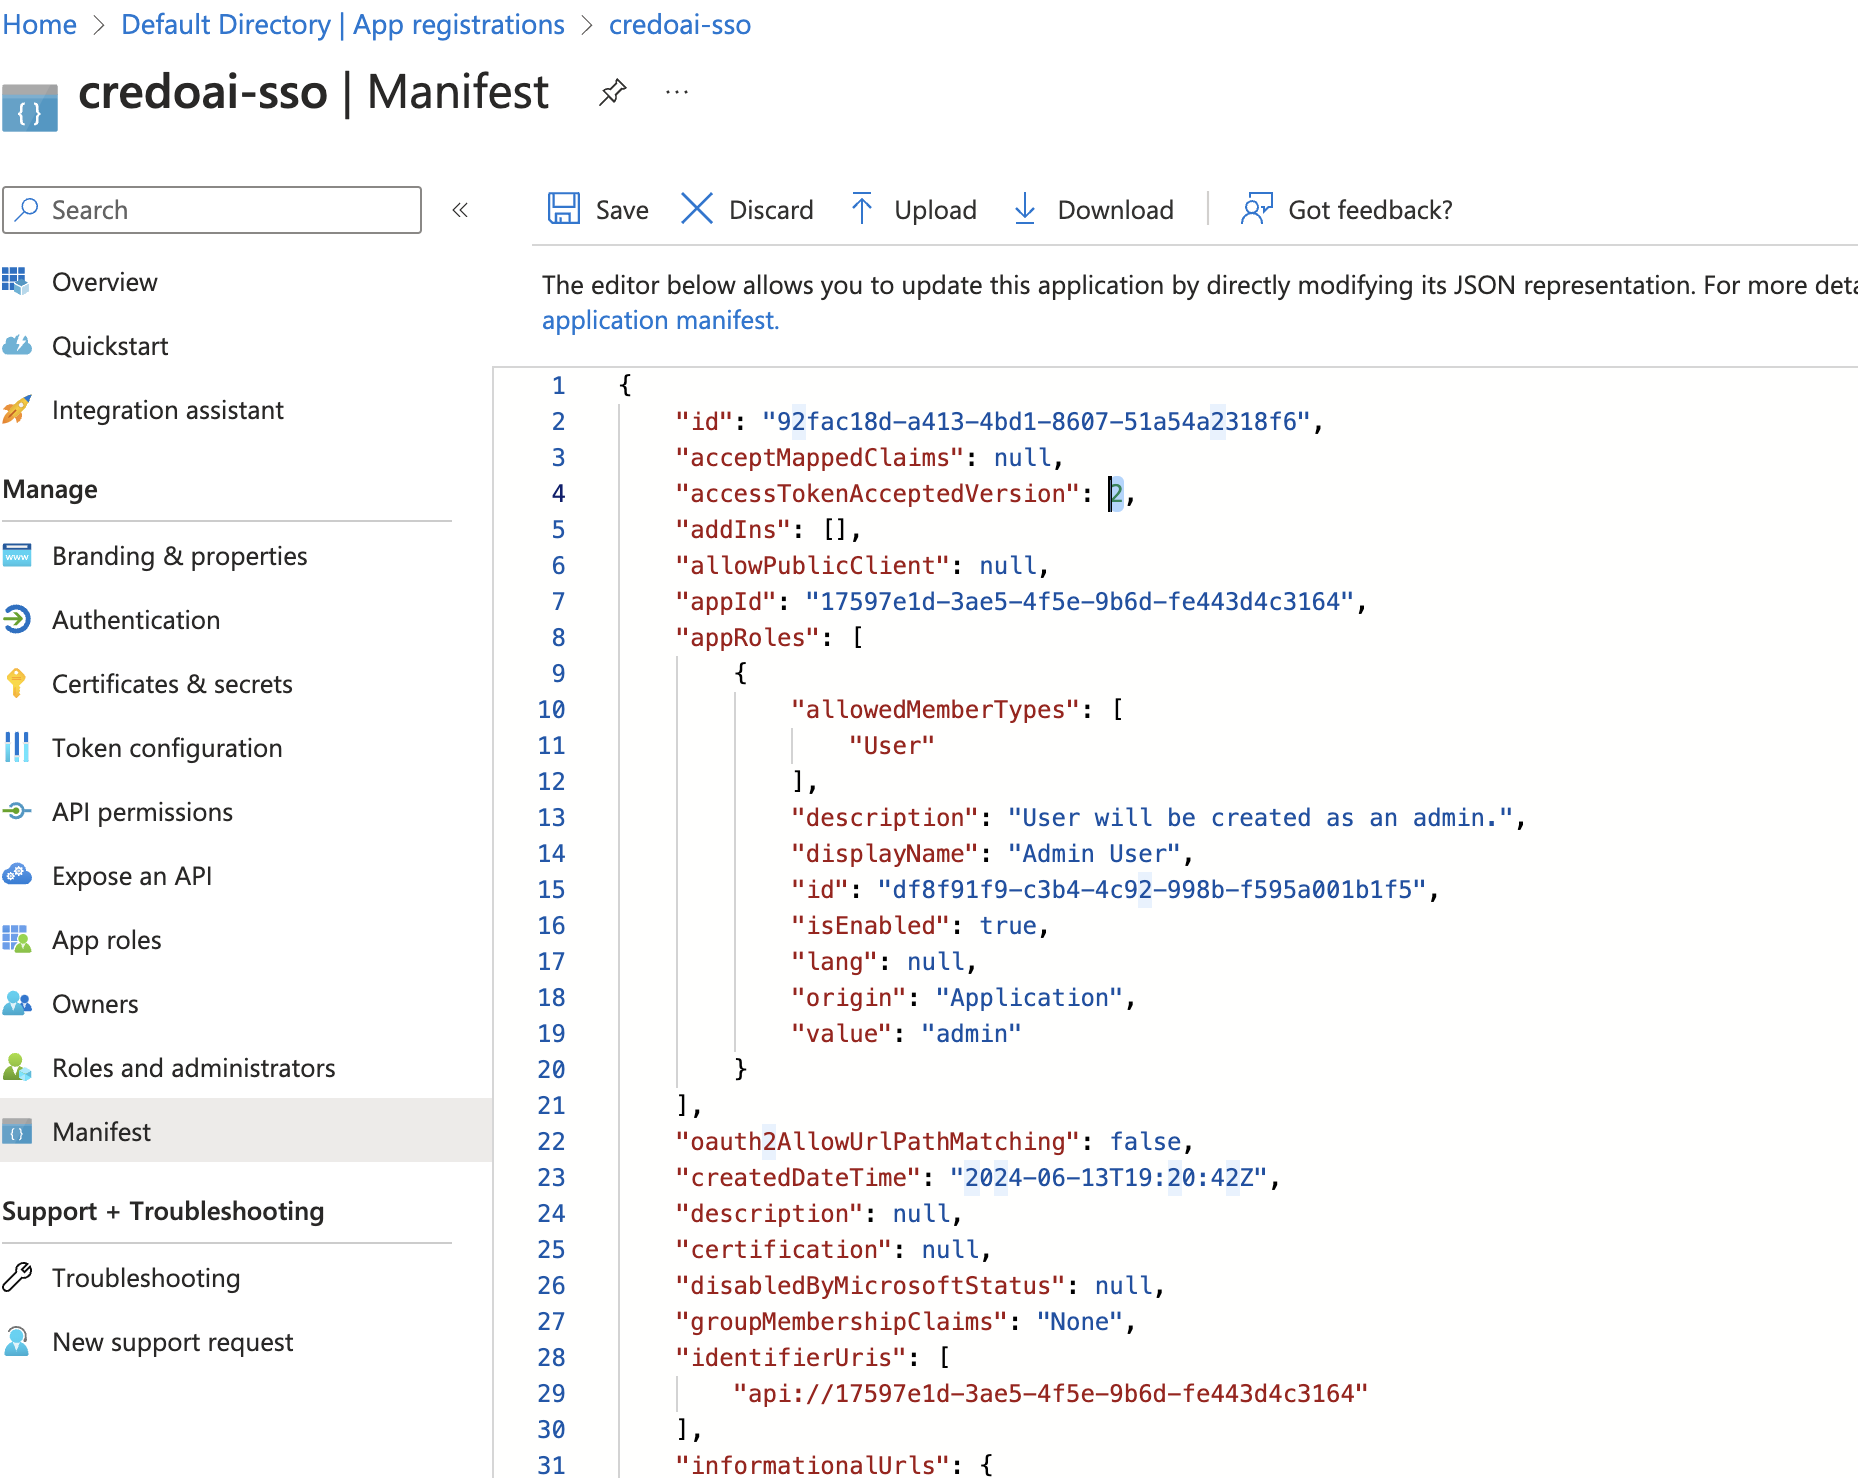
Click Save.
Step 8: View Endpoints
-
View Endpoints
In the Overview section, scroll down to Endpoints to get the URLs necessary for OIDC configuration in your application.
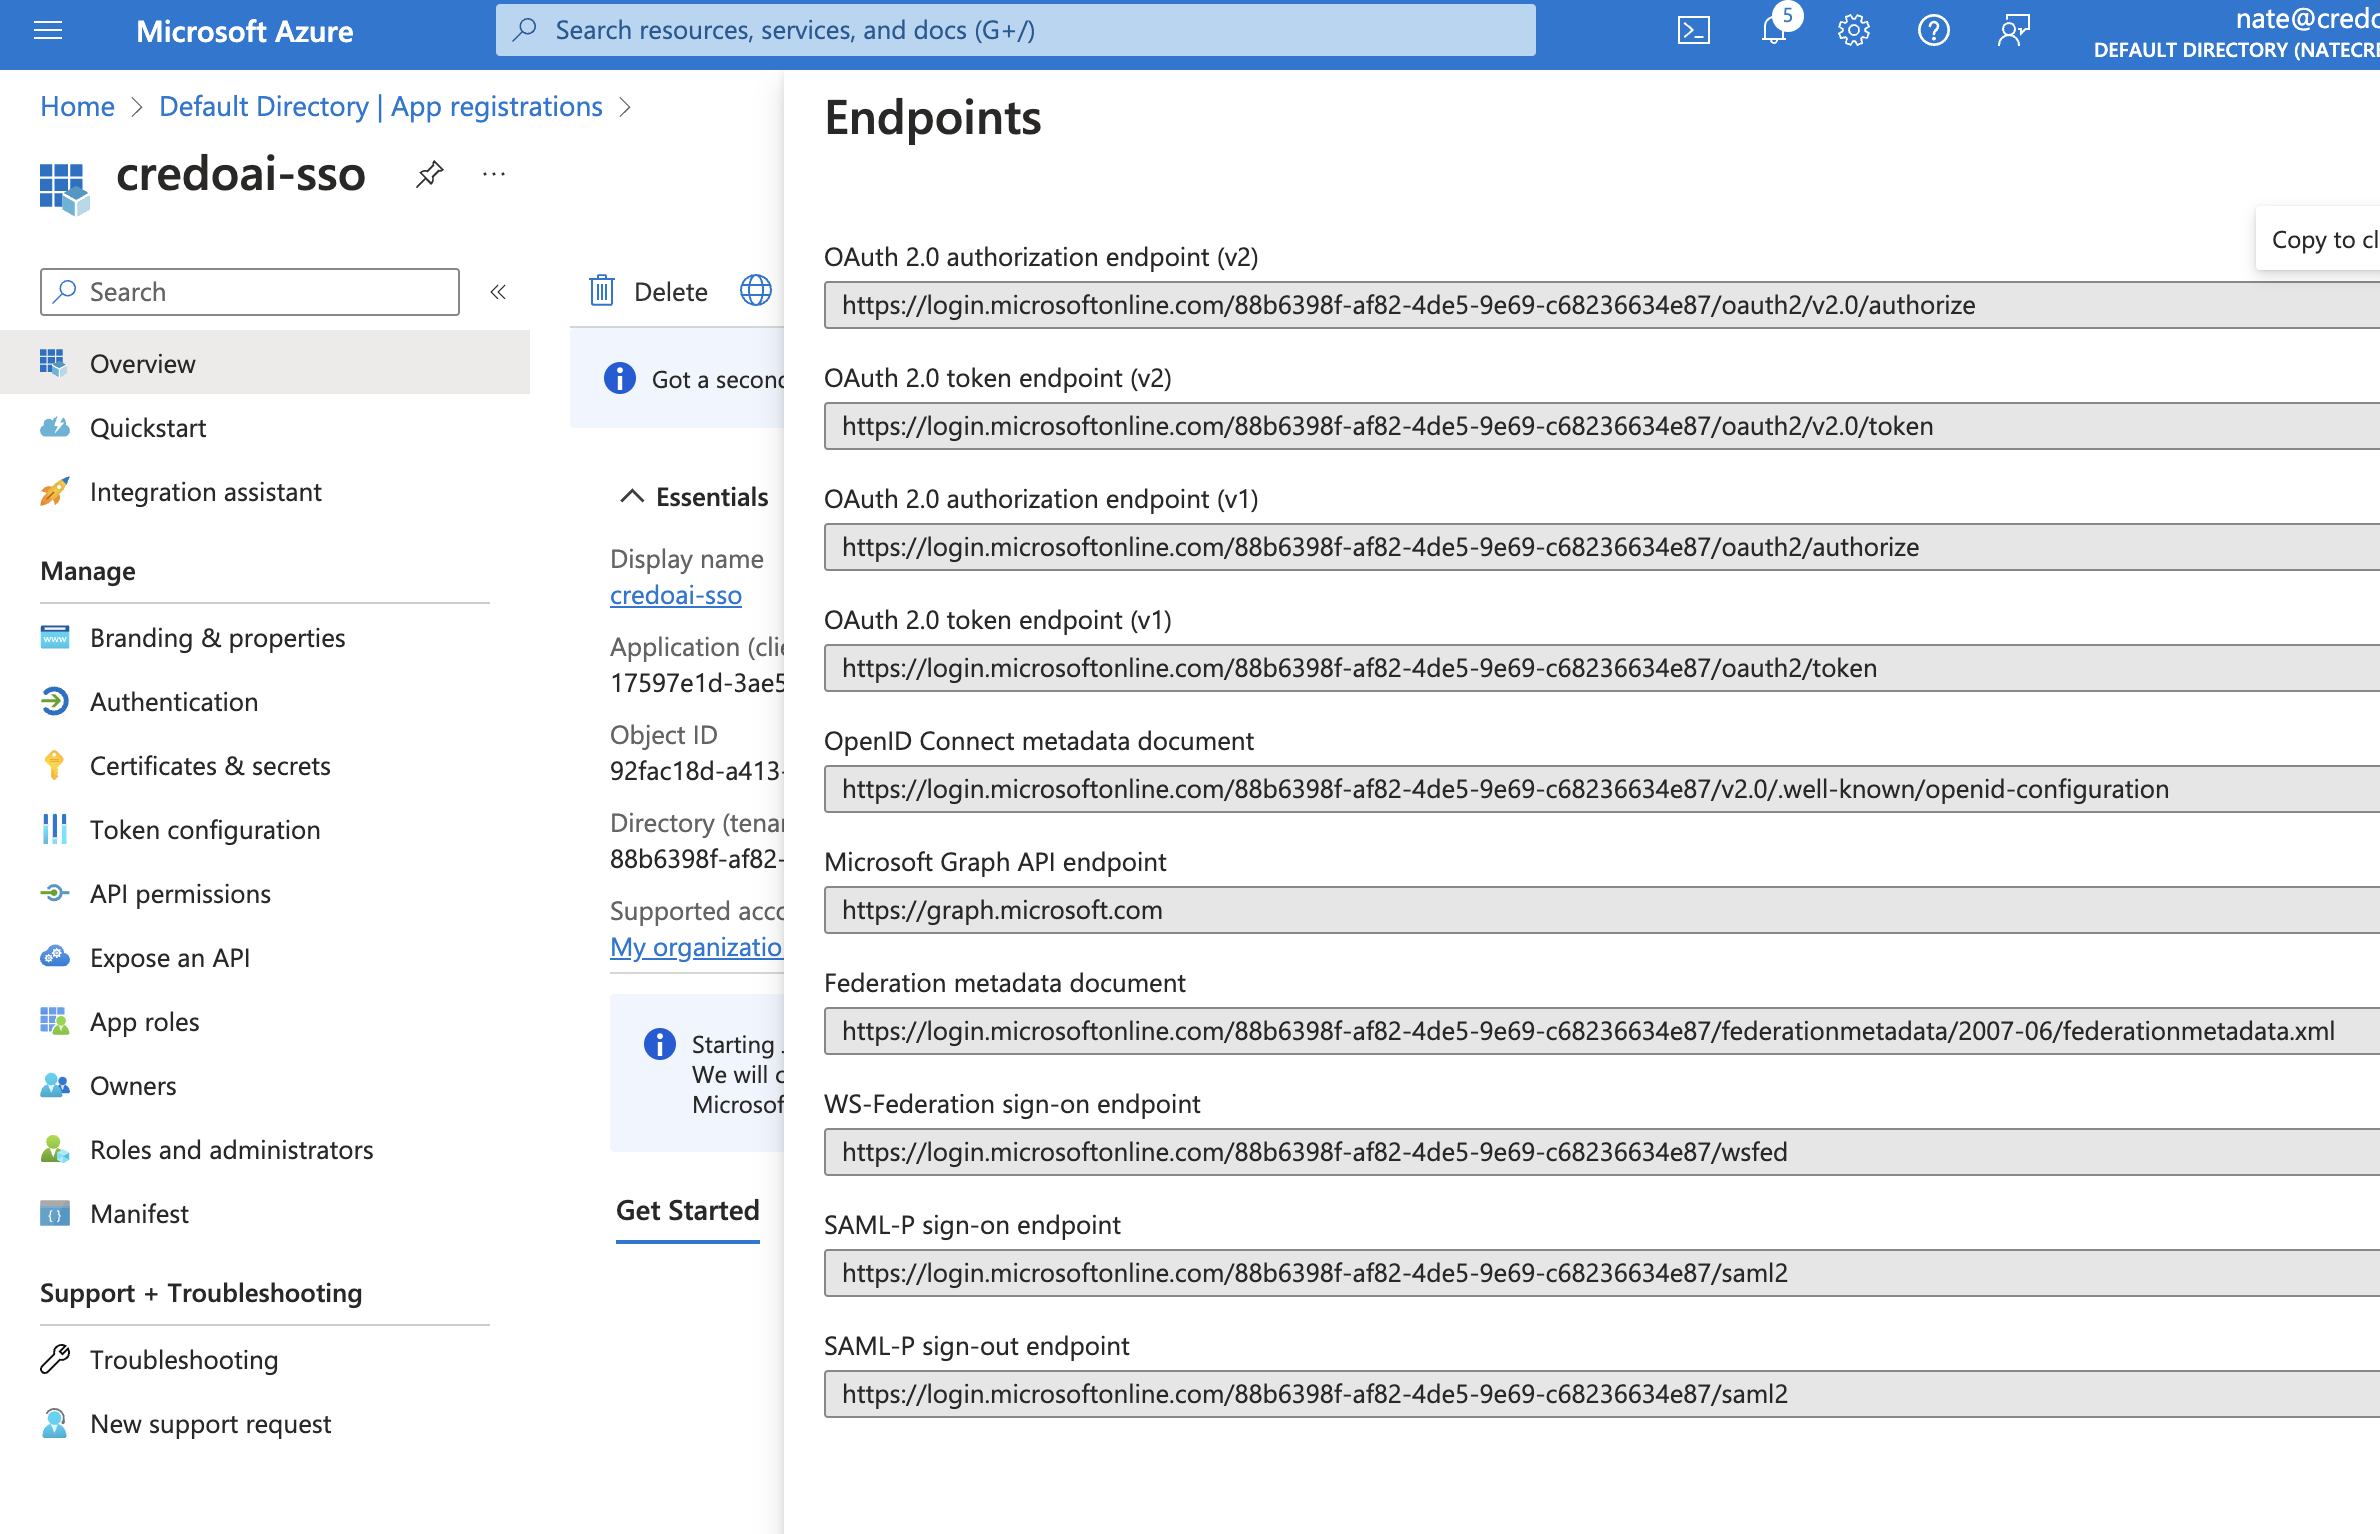
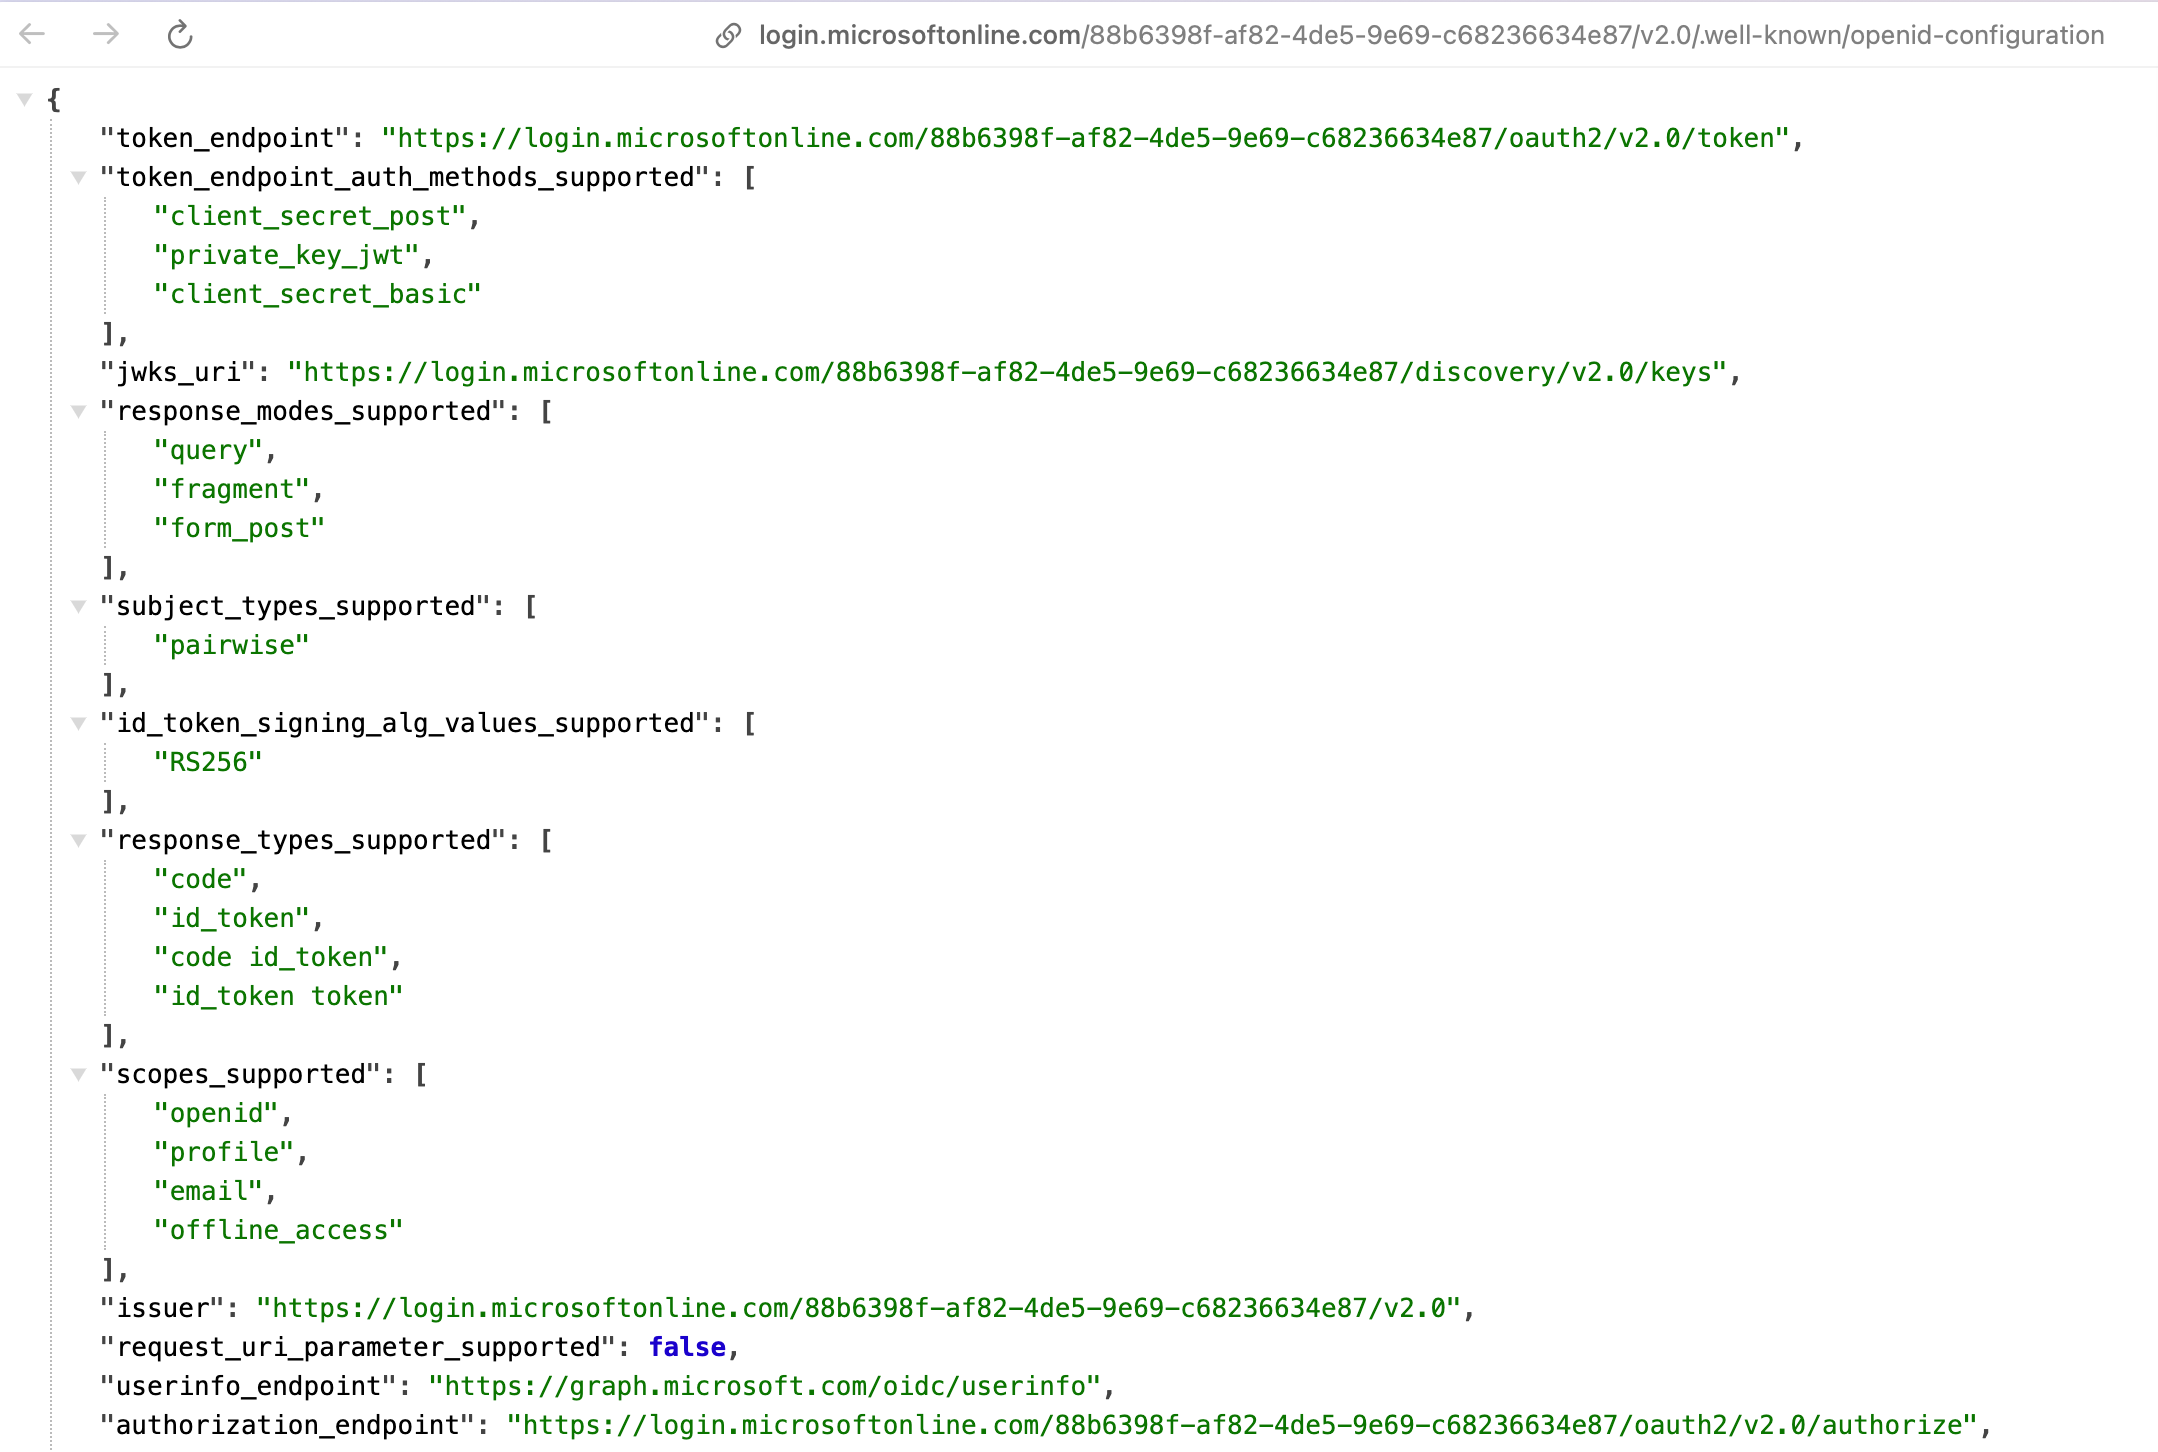
Navigate to the URL called
OpenID Connect metadata document. This will be of the form:https://login.microsoftonline.com/<tenant-id>/oauth2/v2.0/.well-known/openid-configurationThis will open a page with a lot of URLs. You will need the following:
issueruserinfo_endpointjwks_uri
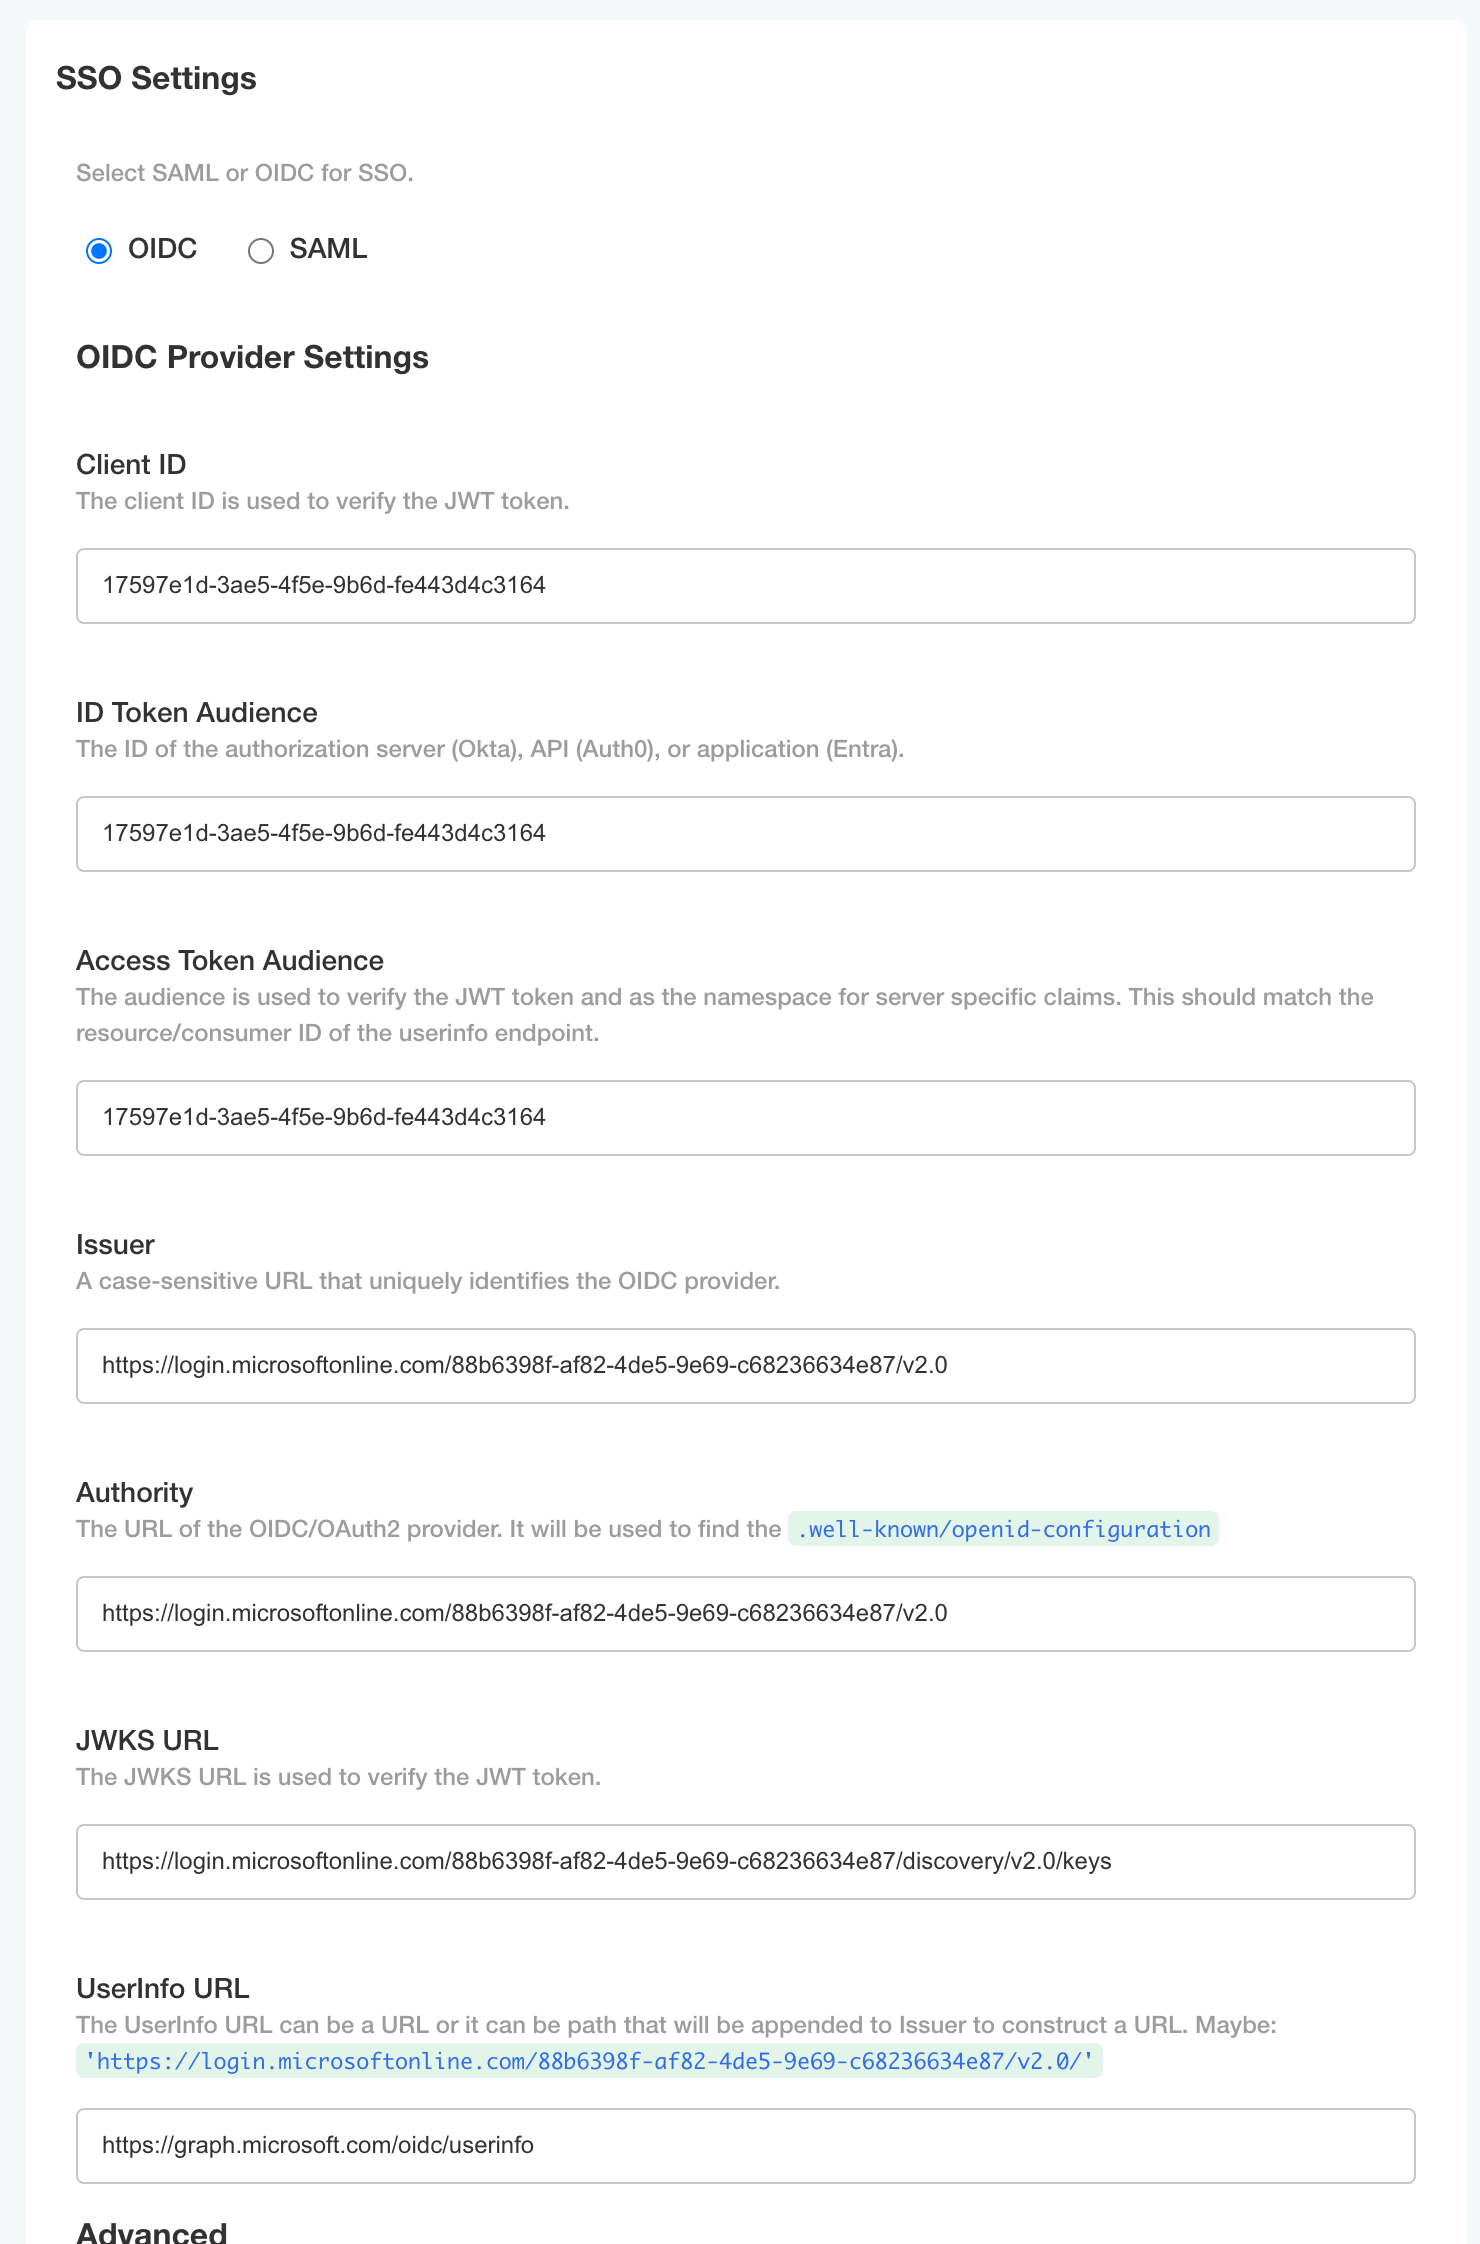
Step 9: Configure Credo AI
Under the SSO Settings tab, enter the following:
- Client ID: The value of the
client_idyou noted earlier. - ID Token Audience: The value of the
client_idyou noted earlier. - Access Token Audience: The value of the
client_idyou noted earlier. - Issuer: The value of the
issueryou noted earlier. - Authority: The value of the
issueryou noted earlier. - JWKS URL: The value of the
jwks_uriyou noted earlier. - UserInfo URL: The value of the
userinfo_endpointyou noted earlier.
Select Configure overrides and the Advanced sub-heading.
- Admin Groups: Enter
adminswhich should match the App Role you created earlier. - Scope:
openid profile email offline_access <api-scope>where<api-scope>is the scope you created earlier (e.g.,api). - JWKS Algorithm:
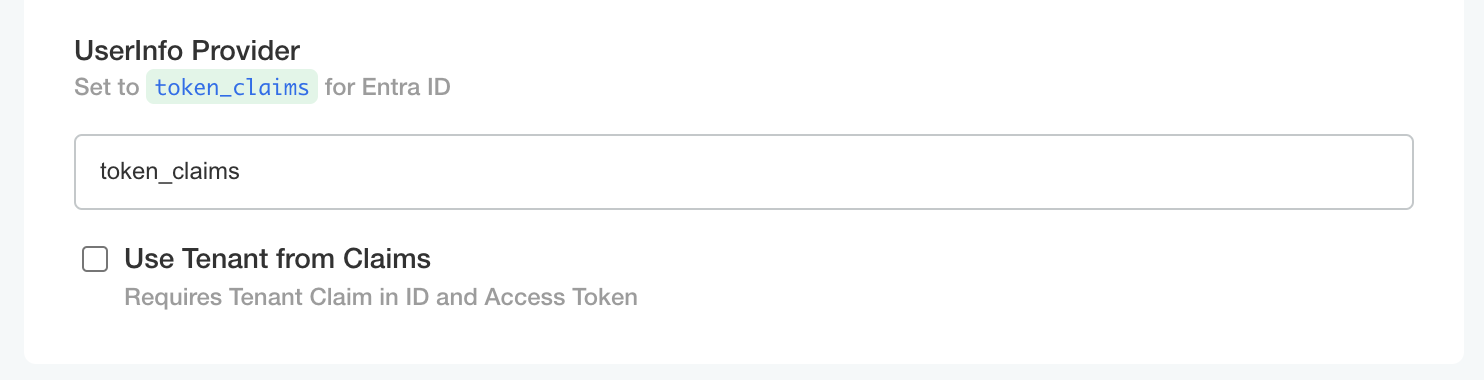
RS256 - UserInfo Provider:
token-claims
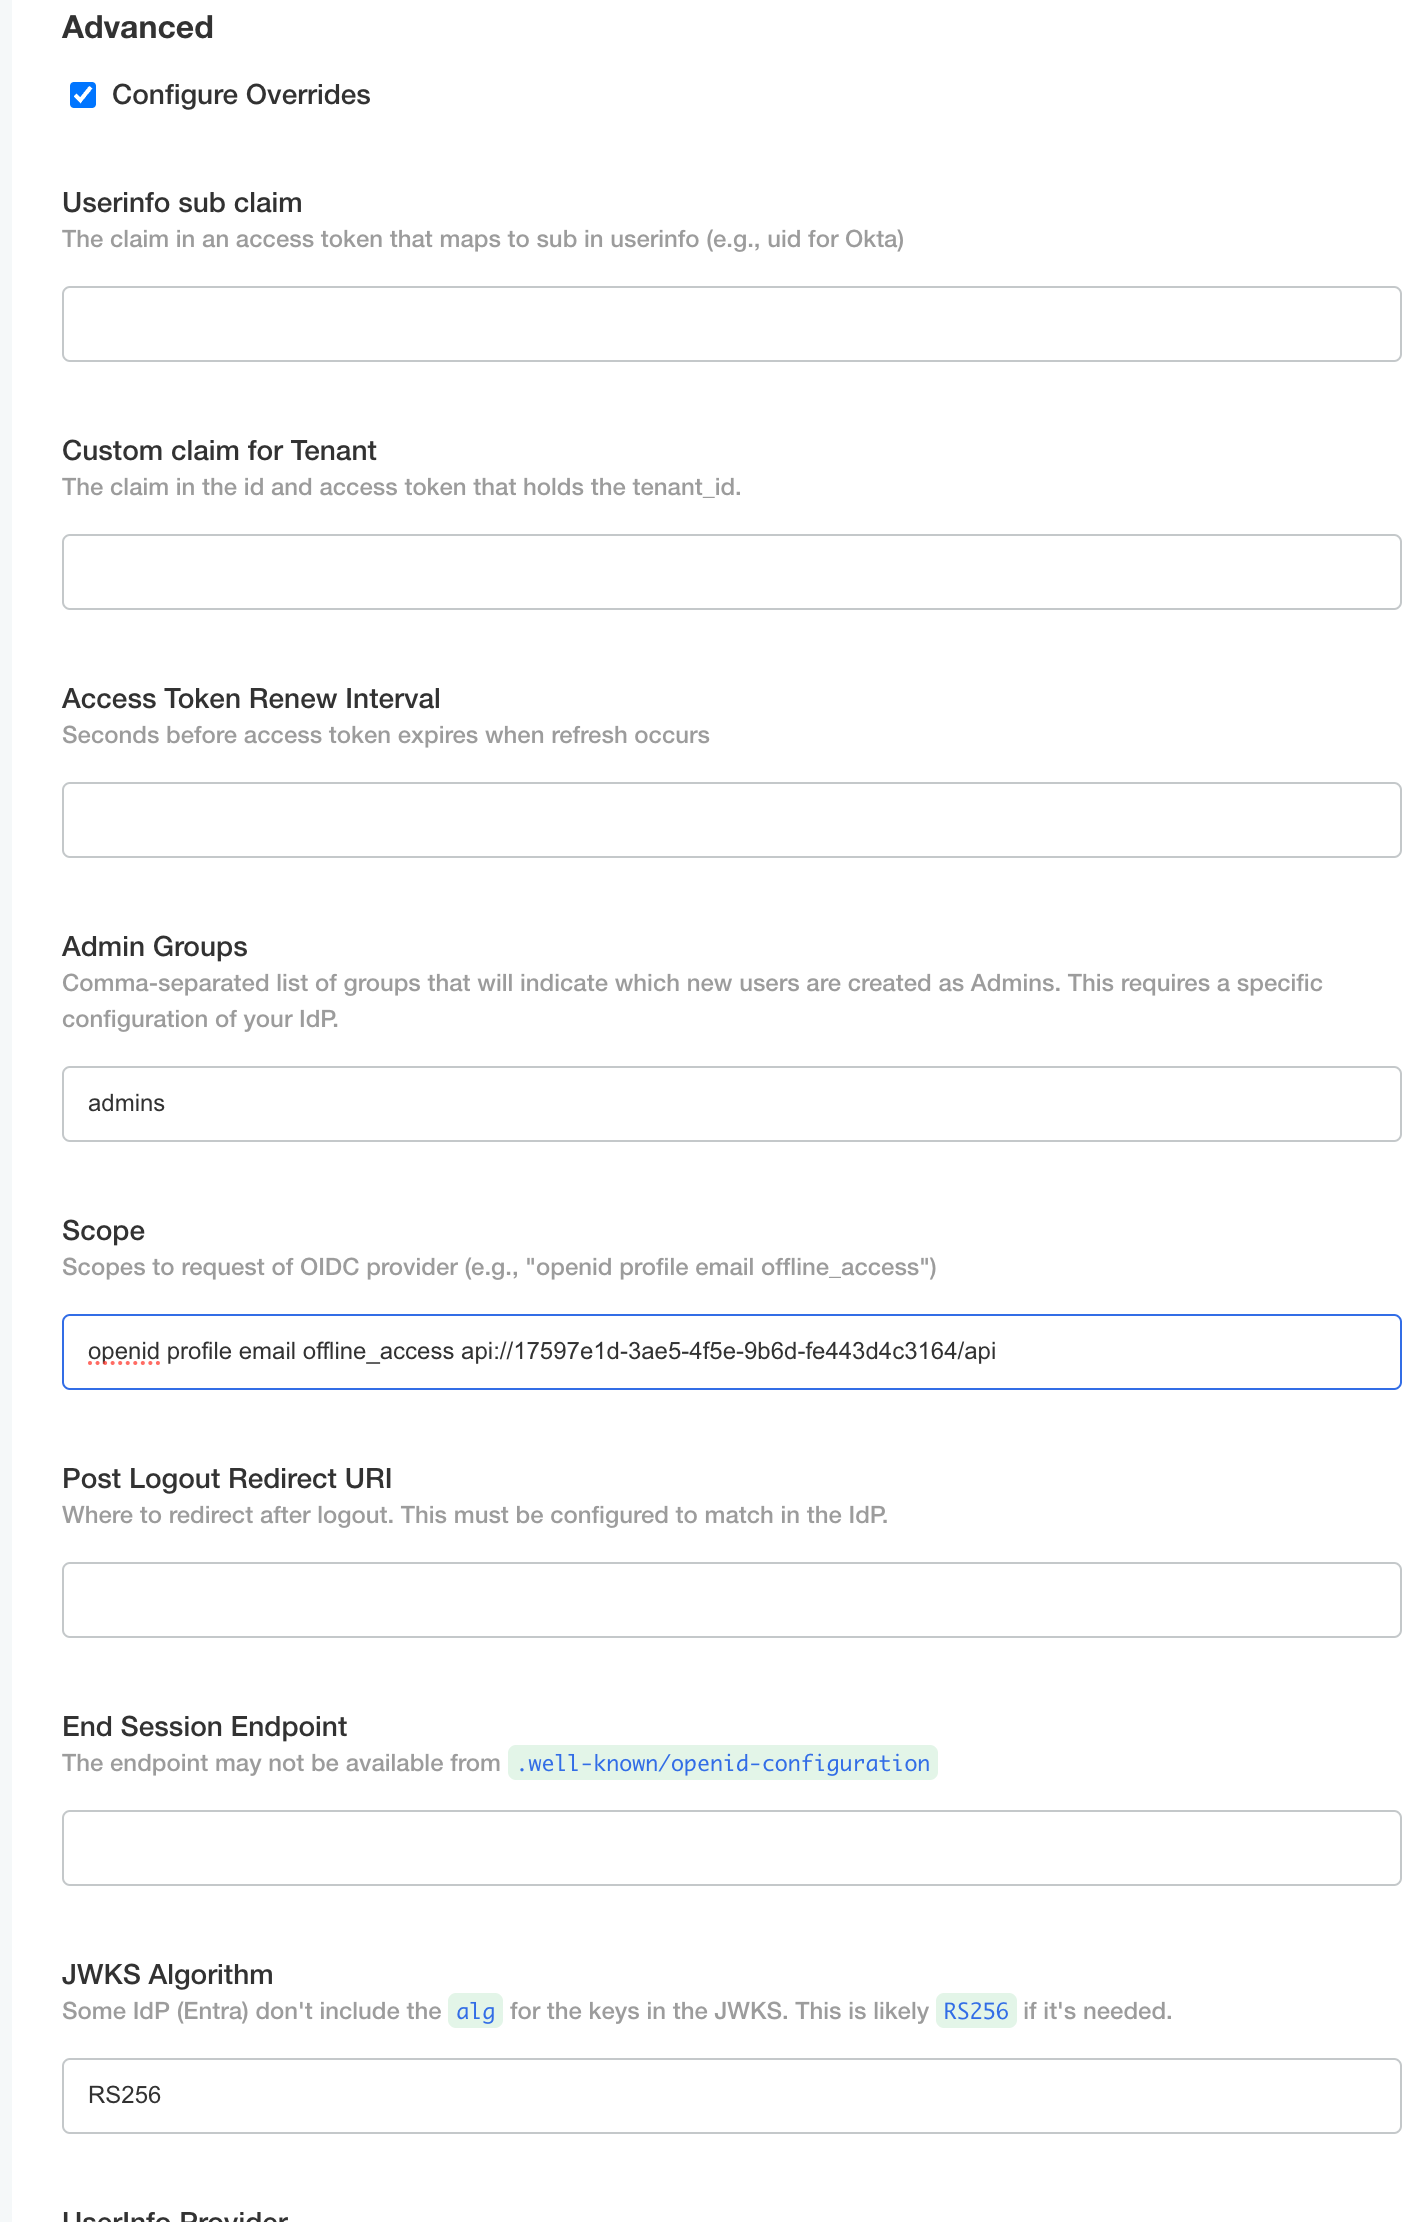
Click Save config. Then deploy the updated configuration.